Category Archives: bookbinding

Fifty Shades of Purple

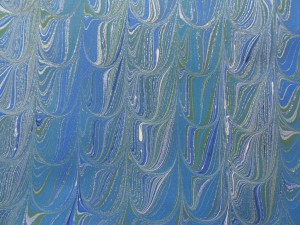
Last week I had a wonderful marbling session!  After the angst of the last carrageenan disaster, I was a little bit worried about starting one, especially as I had a special order to work on.  Specials are always a combination of fun and dread.  Fun – to be working with someone else’s ideas and color palette, and dread that I’ll mess it up. This time the theme was purple, specifically toward the blue end of purple rather than the red.  In looking over my colors, I realized that I had several red purples but only a tiny bit of Ultramarine Violet. I quickly ordered some and decided to try mixing some.  Mixing colors when marbling is always a challenge for me.  Some blend very nicely and float well, but others just don’t. Probably has something to do with the chemical makeup, specific gravity or density of the pigment. No clue.  Anyway, this time it worked!
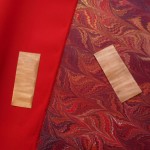
Here are my purples, maybe not quite 50 shades, but a couple dozen!

I did finish up with other colors and some fun.

The first photos show some of the other colors I played with at the end of the session. The rest of the photos come from  spoiled copy of a fashion and pattern magazine for August 1898.  The incredible wasp waists fascinated me.  I can’t imagine having to wear them. I love the color prints and don’t know what to do with them.  I’m not going to marble them!  The ones I did marble were black and white.  The last two images are from my odds and ends. The first is from a Children’s magazine, “The Chatterbox”, which has lots of sad tales full of tragic heroines and Victorian morals. The last is the back cover of sheet music printed in 1915.  Fun combination of interesting stuff!

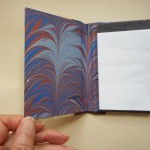
To finish the week, I finally completed five little books I had started a while ago using the trimmings from larger books.  All of them are roughly 4″ x 4″ and to make up for their small size, I made them thicker than I usually do.  Even though they take almost as long to make as their bigger sisters, I find these fun projects.

Like the hearts and flowers!  The tools and the garlands have leather spines.

3 Comments

Filed under bookbinding, Marbled Paper

Smushed Cups

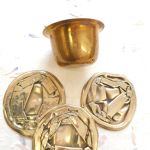
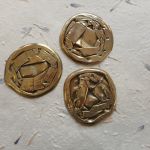
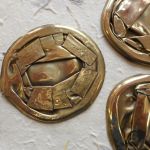
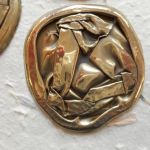
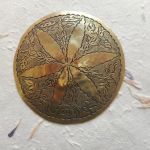
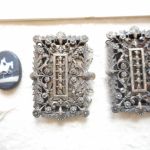
Sam Castner comes through again!  I recently asked Sam to flatten a small, incised, brass coaster.  I knew it would be easy for him since he has a press that will smash anything by putting a gazillion pounds of pressure on it.  At the same time, I gave him some brass drinking cups that had split their sides.  These had been brought home from India by my mother in the 1970s.  I gave him carte blanche with the cups – just saying to do something with them.  Since he was smushing (is too a word) my coaster, he decided to smush the cups also.  Brilliant. Here is the result:

All of these will be used as ornaments for books or boxes.  If you have a special desire for one, let me know and I can work to order.  When Sam delivered these, he also brought some other goodies.  I’m overwhelmed with the possibilities.

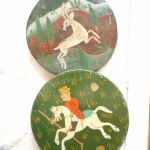
I’ve also been back at cleaning out junk and treasures that I’ve collected or inherited over the years and always keep an eye out for anything I can use on my books or boxes. Last week, I was really on a tear and besides getting rid of piles of stuff, rescued these for reuse.

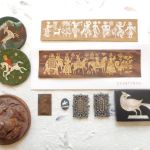
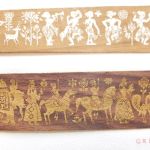
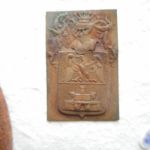
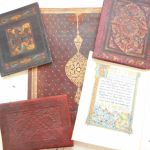
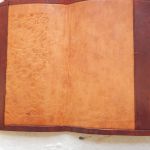
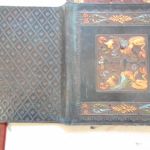
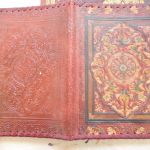
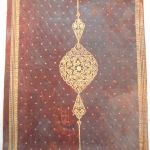
The last of my finds came from my aunt who lived in French Morocco (now Morocco) in the early 1950s.

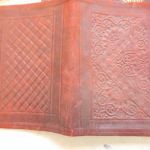
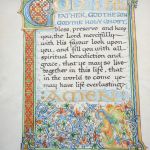
These cases or wraps seem to have been made to protect books or hold papers. I’m not sure what the large one was for. It’s much to big for a book.  I’m thinking about using the leather in some way to create covers for my blank books, but I may change my mind.  The vellum prayer was with the leather, but I think that was just happenstance.  It looks to me like modern English work. It is on parchment, but not old.  Maybe something my mother bought when she was studying illumination in England in the late 1950s, but I really don’t know.  Not a clue how to use it, but it’s neat.

Moral is it pays to clear out the junk!

Even if it does add to the “have to make” pile.

Leave a Comment

Filed under Art, bookbinding, Craft design, Other crafts

Three and a half and counting …

I spent yesterday and today hanging my part of the Holiday Exhibit at the Arts Center of Yates County.  Had a great time working in the Gallery and am very pleased with the display.

I changed the setting on my camera on the second day, causing the difference in lighting.  Bonnie Barney set up the mirror table for me, giving wonderful reflections of the books and boxes.  Very striking!

Exhibit will be open from now to the end of the year.  Be sure to stop by!  Lots of other fascinating art and craft items.  It’s a great place to do your Holiday shopping.

Opening reception with food & wine is this Friday, Nov. 21st from 5 to 7 pm.

ACYC
127 Main Street
Penn Yan, New York

Call for directions  315-536-8226.

See you there.

2 Comments

Filed under Art, bookbinding

Three To Get Ready

“One for the money,
Two for the show,
Three to get ready,
And four to go.

I’ve been in the “get ready” phase for the past few weeks and the finish is almost here!  My local Arts Center is hanging their holiday exhibit next Monday and I am going to be one of the featured artists.  I’m thrilled to be chosen and have been working hard to create lots of new items for the show.  My biggest problem is that as soon as I finish something, I have the design in my head for four more things I want to do.  With hanging only a week away,  there’s very little time for anything else, besides finishing up what I’ve already started.

Here’s a sneak preview.

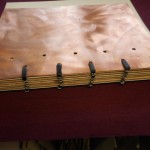
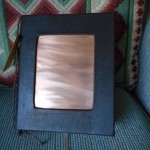
The red book with the copper insert will have a matching box and I have a third black & white box under construction.  Two more blank books are waiting for covers. I don’t think I’ll have any sheets of marbled paper, but I will have cards, a few framed pieces and some odds and ends.

If you are in the area, please be sure to visit  the Arts Center at 127 Main St., Penn Yan, NY.  “Celebration” will have its Opening reception with food, wine and art on Friday, November 21st from 5 to 7 pm.  If you can’t make the Opening, stop by anytime Nov. 21 – Dec. 31.  We’d love to see you!

Leave a Comment

Filed under Art, bookbinding, Notebooks

Unfinished Matters

I haven’t posted in a while, but I have been moving forward on several fronts.  In fact, I seem to have too many half-finished projects so thought I’d give you a glimpse of some of them.  Ever since Labor Day, I’ve been trying to set up a marbling session, but something always seems to interfere.  I think it’s called Life. To marble, I really have to have at least three days clear when I can concentrate just on that – four or five is even better – and it’s just not happening.

So on to what has been happening!  About a month ago,  I  wrote about some books I was starting using some of Sam’s metal.  Those books are not all finished, but progress has been made.

Metal books, memo pads and more.

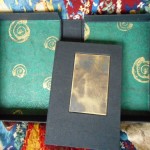
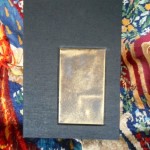
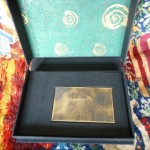
This is the book and matching box I made for the brass pieces.  The brass had originally meant to be covers for a very small book, but I wanted to show them off more than that so I made this elegant book and box set.  I’m really pleased with how they turned out and can’t wait to put them in the Christmas Exhibit at our local gallery.

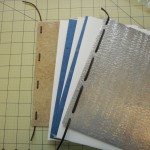
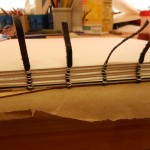
I’m not as happy with the Coptic book.  Love the covers, but I have never been a fan of Coptic binding. It is not very stable and doesn’t wear well.  I’m especially concerned that the metal will eventually cut through the binding cord.  If I do any more of these, I’ll have to find a way to put padding between the sewing cord and the metal, perhaps with a grommet.

While finishing the first two books, I started working on two other metal covers, but these are sewn over leather thongs.

I  haven’t finished these as I’m not sure about how I’m going to attach the spines. I don’t want an open spine, so I’ll have to attach the leather spine to the metal covers. Right now, I’m planning on a hollow spine with the thongs laced through the leather spine into the metal covers and using an adhesive to adhere the leather to the covers.  I still have to shape and pare the leather before I attach it.  Not sure how well it will work, but it’s fun trying!

Last was the book I am making from the leftover paper from the metal books.  It’s only 3″ high and isn’t finished yet.  I was going to call it “Mousings”, but  thought that might be a bit cutesy.

Next projects:

No idea what these will turn into, but I love these combinations!

Leave a Comment

Filed under bookbinding, Craft design

Design Decisions = Fun and Frustration

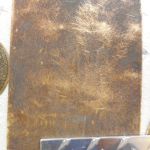
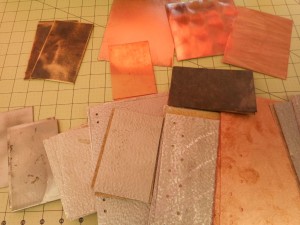
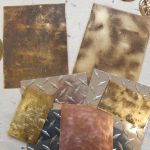
During the last week or so, I’ve been mulling over what to do with all the metal goodies

I have. If you don’t remember, this is the pile.

DSCN0001

I’m concerned about adhering anything, leather, cloth, tapes, etc., to the metal as it will need a strong bonding agent.  The ability of any material to withstand constant contact with metal may be another problem. For example, in a Coptic binding, how quickly will the metal cut through the binding thread? I’ve smoothed and rounded the edges and corners, but will it be enough? Will I have to cover the edges with a softer material?  So far lots of questions, no answers. This is what I have planned out, now to try to find out what will work.

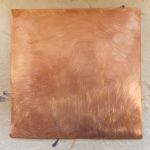
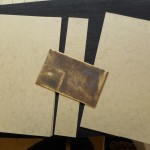
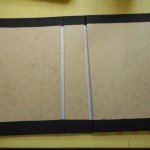
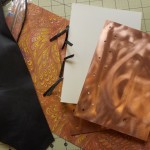
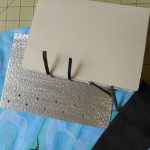
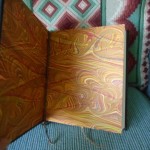
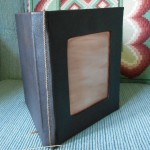
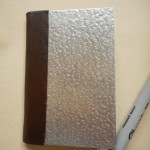
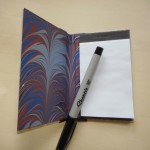
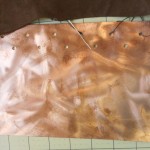
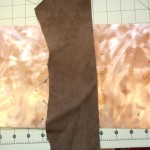
These two have already been finished.  The book cover was made by creating a “sandwich” of two pieces of binders’ board with the copper plate in the middle.  The center of the top board was cut out, exposing the copper. This is one of the easiest and most secure methods of using metal, but it is essentially just decorative, not an integral part of the structure of the book. For the small notepad, I glued the metal directly to the leather spine using a metal adhesive. There were remnants of adhesive webbing on the reverse of this aluminium, so I just used PVA on the marbled paper.  This is a prototype and it will take some testing in use to see if the leather needs reinforcing or if other adhesives are needed.  I decided to do this one as simply as possible to test the strength of the bonding.

Now for what’s in planning stages:

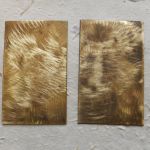
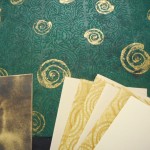
These two lovely brass plates were originally intended to be front and back covers, but while playing, I changed my mind. I tried them with a dark brown leather, but much preferred the look against a black Italian bookcloth.  Sam Castner textured these for me and I really like the edges, so instead of making a sandwich as I did for the copper, I’m going to inset one into a book cover.  To inset, I’ll carve a piece out of the top board just slightly larger than the brass. The boards are then covered with bookcloth, which is pressed into the depression, and the brass is adhered as the final step.  The green decorative paper will be used for endpapers and the lacy tissue makes section dividers.  The other brass piece will be inset into a clamshell box that will be made to fit the finished book.

Although I don’t care for Coptic bindings in general, I thought I would try at least one and the holes were punched on these plates for Coptic sewing.  I’ve added a leather lacing just for decoration.  I’m going to sew this with a heavy waxed thread, but really expect the metal to cut through it.  It’s worth trying on a prototype anyway.  Sewing on cords that are laced into the cover will probably be a better technique.

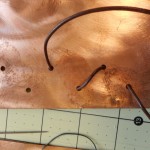
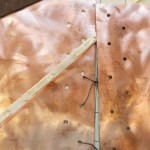
I’m completely undecided about this last piece.  I love the copper plates and want to use them as the boards for a book, but I have no clue as to how I’ll construct the spine.  At the moment, I’m thinking about a leather covering over wrapped cords. Maybe using rawhide or leather thongs for the cords and lacing them into the copper.  The holes in the copper can be used structurally or just for decoration.  They could be covered with leather or bookcloth or left exposed. Not sure of anything, just know I love this copper and will have to find an appropriate venue for it.

Leave a Comment

Filed under bookbinding, Craft design

Updates

I’ve just updated my page on Building a Scrapbook and tomorrow, the books should be finished.


Textblock is placed inside cover

Textblock is placed inside cover

I’ve also written a bit more in the Problems of the Marbling Kind about paint

Getting the paints balanced perfectly with your size can be very tricky.  One of the most obvious problems is having the paint contract into a tiny ball and drop to the bottom of your tray.  This happens when the paint is too thick or heavy in relation to the size.  The solution is usually to add more water to the paint, a few drops at a time.  Alternatively, a surfactant can be added to the paint.  … for more see above link.

Silver granulation

Silver granulation

Leave a Comment

Filed under bookbinding, Marbled Paper

Scrapbook Construction

In the past few years, several people have asked if they could use my blank books as  scrapbooks.  My answer has always been an emphatic, “No!” Inserting extra thickness into any tightly bound book will sooner or later break the spine. With a Coptic or long-stitch binding there is a bit of leeway, but as soon as the boards or covers move beyond being parallel, the hinges are put under stress and will break.

The goal in building this type of book is to accommodate extra thickness between the pages while using a strong binding structure that will support extra weight.  I, personally, don’t like making scrapbooks: they tend to be large and I like small. The pages are difficult to sew and the endpapers can be a pain, I am documenting my progress on the page “Building a Scrapbook” if you are interested in the nitty gritty.  I’m still working on the books and will be updating the page as I progress.

On another matter entirely, I recently stopped by Sam Castner’s workshop and came away with some fabulous ideas and these:DSCN0001

Now I have to get to work designing and making!

Leave a Comment

Filed under bookbinding, Craft design

Finishing the Four Books That Were Started So Long Ago!

It usually doesn’t take me this long to finish my books. Really!  The story of these books started with the tiger blog. I’ve had many interruptions that have interfered with the flow, including one very exciting development that will be ready to be unveiled, uh,  soon.  I also gave myself a present of some super bookbinding equipment that you’ll see in the photos. I bought a finishing press and a plough from Jim at Affordable Binding Equipment.  For non-book people, a plough is a tool with a very sharp blade that is used to trim the edges of the textblock, giving an almost polished edges to the text.  They are very expensive and most non-professional binders don’t have them, instead using hand-torn, deckle or other rough edges. I rather like the rough edges as they give a hand-made feeling to the book. You can get perfect edges at your local office supply store!  That said, I enjoy having the ability now to do either with ease. Both the press and the plough are beautifully made and a joy to use.  I’m almost reluctant to use them for fear of scratches and dents.

First step was to try out the plough and cut some edges.

Ploughs usually have a straight, not circular, blade, but I found this design works well and is very comfortable to hold.  I was a bit concerned since my hands are small.  The person who recommended it to me was well over 6′ tall so I would guess that anyone would find this easy to use. Texts should be ploughed before the covers are measured to ensure an accurate fit.  I had already made the covers before I bought the plough, but I just couldn’t resist trying it out.

Next steps are to finished off the text block spine with ribbon marker (register), endbands, and mull or muslin. Then line out with paper and add a hollow tube.  With books as thin as mine usually are, some of these steps could be left out, but I usually add them all to ensure ultra-strong joints.

Now the textblock is finally finished and just needs to be married to the cover.

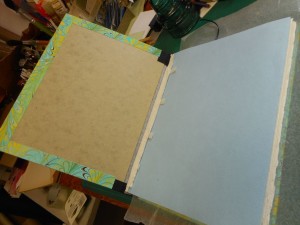
The textblock is carefully aligned with the cover and a piece of scrap paper is placed under the endpaper to protect the book. The endpaper is pasted out with PVA (No, it’s not Elmer’s although it looks like it!).  The waste paper is discarded, replaced with wax paper and the cover is gently closed. At this point everyone wants to open the cover to see what it looks like.  Do not do it! It’s a guaranteed way to wrinkle the endpaper. A piece of blotting paper is slipped under the cover, the book is flipped over and the other endpaper pasted down. The books is then put under weight and left to dry. It should not be opened until everything is totally dry. I usually leave my books overnight.

Finished books

If you still want to see more, please go to my page on Designing a Book and follow the links.

I will probably be putting these books up for sale on Etsy within the next few weeks.

Losing Her Marbles on Etsy

Leave a Comment

Filed under bookbinding

More on Cases

Explaining making cases seems to be taking even longer than actually making them!  We’re getting close to the end. Promise! This blog will be a quickie, just on covering the boards.  It’s one of my favorite parts as it is really the beginning of the end and I wind up with something that really looks like a book.  It also is the stage where my decisions on color, size and paper either come together or just miss.
So here are the graphics:

First the cover paper is cut to size leaving about 3/4″ turn-in on three sides. Fourth side will be flush with the spine. Before pasting out the paper, measure the paper against the spine and put a tiny pencil mark at head and tail.  These will be your guides as you place the paper down.  Using these marks as guides, place the dry paper under the board and trim the corners.  I use two pieces of scrap board as a cutting guide.  This gives a turn-in on the corner that is a bit larger than recommended, but it has saved a lot of covers for me!

With everything marked and trimmed, paste out the paper starting from the center.  Always put your adhesive on the paper and not the board. Paper stretches when it comes in contact with any moisture and you want it to stretch before it is on the board.  This way, as the paper dries, it will shrink giving a nice smooth fit.  Paper that has been pasted out will tend to curl or become all loose and floppy so the register marks become very important.  As you place the paper down, the marks will NOT be quite accurate because of the stretching. If you are worried about getting a perfect edge between the paper and spine, you can let the paper ride up over the spine by a tiny amount, not more than 1/32 inch.

When I paste out, I leave a very small dry area at the fore edge turn-in and on the spine edge of the head and tail turn-ins. This allows me to handle the paper from these very small dry areas and not get PVA all over my fingers. It also seems to give me more control over the paper. The bad part of this is that some papers will pucker around any dry area.  As with any technique, try several and use the one that works for you.  I work with many different weight papers for my covers and have found that I have to adapt my techniques to the paper.

Lay the paper down, starting at the spine edge and gently smooth it down toward the edges. Don’t rub it down hard until you are sure that it is smooth and positioned correctly. Make a fist and use the pinkie side to smooth down the paper. This is the flattest surface you can make with your hands. Bone folders are not recommended in smoothing damp paper. It’s just too easy to press too hard and tear the paper.  I do use them or the back of a fingernail on the edges on the board to get a nice crisp edge. After the front is pasted, flip the board over and turn in the head and tail and finally the fore edge margins.  You may have to add paste if it has dried or if you have used my “dry spot” method. Cover the back board in the same way and you are done!  Ideally you should have a 3/4″ turn-in all around the case.

Notes on special cases:  If your cover paper has a figurative design, you’ll want to take care on the cover placement.  See the airplane design in the photos. In cutting the paper, I had to waste a bit of paper to place the red plane where I wanted it. With any designs that have a definite up and down, make sure you cut pieces that are mirror images of each other, not the same and that both are facing in the same direction when on the book.  All over designs are much easier.
Half-cloth binding: On the binding that has bookcloth on the corners, I marked the board with diagonal lines 1″ in from the top and bottom fore edges. After registering the head and tail, I folded the paper along those lines. The paper was then trimmed along the same lines and pasted down, leaving the board exposed in the corners.  The small triangles of book cloth were pasted onto the board corners, trimmed, folded under and pasted down.

In general when pasting, always put the paste on the material that will stretch the most. Everything, even board and wood will stretch when wet. With some materials it is hardly noticeable.  PVA dries faster than paste which has the advantage that it “grabs” quickly and the disadvantage that re-doing something becomes harder.  Paste is much more forgiving and a cover can be repositioned several times, but it grabs more slowly and you may have to hold something in position for a while.

Next I will put the finishing touches on the textblock and marry the case to the text.

Leave a Comment

Filed under bookbinding