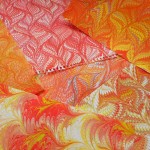
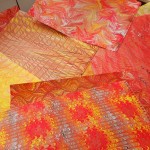
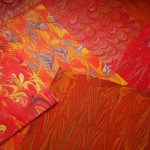
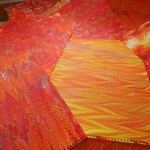
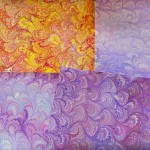
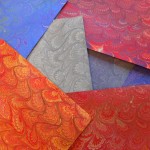
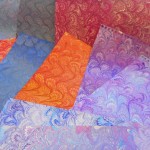
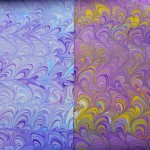
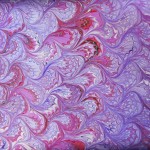
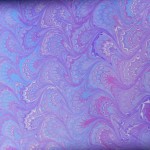
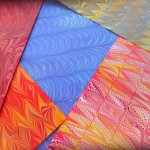
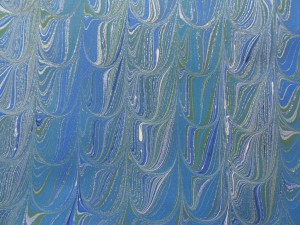
Category Archives: Marbled Paper

Marbling on Paper: Step by Step

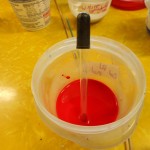
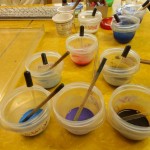
At my Open Studio in April, a friend took numerous photos while I was marbling. I’m posting them without much comment to create step-by-step documentation of the entire process of marbling.
Some of the steps that have been left out are putting alum on the paper, mixing the carrageenan and skimming or cleaning the size. You can find pictures of all of these operations in my previous blogs, especially this one.

6 Comments

Filed under Marbled Paper

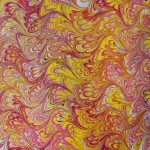
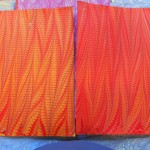
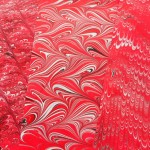
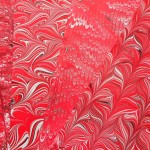
Marbling in Red and Orange for Spring?

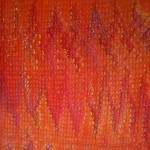
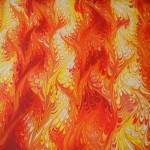
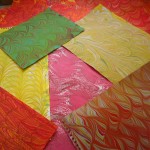
I haven’t done any marbling in a long time, not since last October and I was getting the itch.  I’m teaching a workshop in marbling later this month (April 22nd) and thought I’d better do some to make sure everything is working. There has also been a history of lots of mess-ups after a dry spell.  Fortunately, that wasn’t the case this time.  In fact, I really got into the groove and pulled a lot of great pieces.

Before starting, I was thinking of spring, spring colors, soft pastels, greens, yellows and in general all those lovely Easter egg colors.  Didn’t work out that way.  In the morning as I started preparing the paint, I first pulled out some yellows, but then I grabbed a red. One of the few colors I’ve had success in mixing is orange, so I made a couple of oranges from the reds and yellows. I added the standards – black, white, brown, copper – to the array of paints and decided I had enough colors to start.  Maybe I’d add the makings of pastels later.  After seeing the first sheet of paper come alive with vibrant reds, yellows and oranges, I couldn’t stop.  I just kept throwing the same six or seven colors over and over again in a wide range of combinations and patterns.

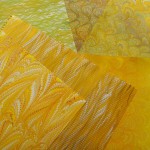
On the second day, I added some greens to the paint choices but I still did a lot with the reds, oranges and yellows. I did one of my minimalist marblings with Nickel Azo Yellow, Zinc White and Van Dyke Brown. The white and brown were only dropped once, but the yellow was dropped numerous times.  That’s the second paper in the first photo.

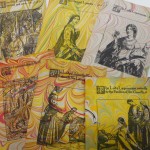
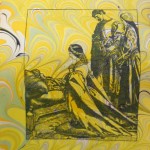
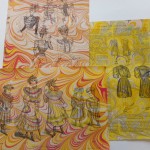
And, of course, I had to play with a bunch of paper. First are some illustrations from a severely water-damaged book of Arthurian legends.

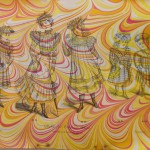
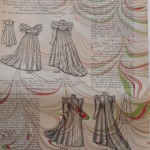
Then some illustrations from a fashion magazine from 1898.  I find the children’s clothing fascinating.  To imagine a six-year old wearing a dress with a train every day is really difficult for me as are the wasp waists on the adults!

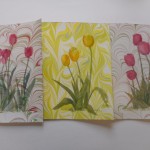
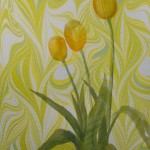
Lastly, I found a pile of sketches my mother had done of tulips but had never really finished.  Had to marble them, of course and so ended up with some spring after all.  Think I’ll keep and frame the yellow one.

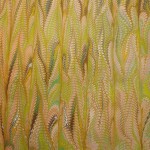
One the last three sets of photos, I dropped about half as much paint as usual, used a lot of white, added some clear and made a loose, lacy pattern.  I think that combination worked well.  What do you think?  I may try this technique when I start marbling maps again.

Don’t forget, marbling workshop coming up. You can register by calling the Arts Center of Yates County at 315-536-8226 or contact them through their website, http://artscenteryatescounty.org/


Happy Spring and Happy Marbling!

Leave a Comment

Filed under Marbled Paper

Update on “How to Marble Paper” page

Three years age I wrote a “How to Marble Paper” page. Since then I have had lots of questions and and I have changed several of my methods. I am currently updating the page. Here’s the first part. You can see the whole thing HERE.

Update to How to Marble

The most frequent questions I am asked are about the basic physical components of marbling – alum, carrageenan, paint and paper.  I haven’t changed the first two at all. Marbling carrageenan (not the food variety) mixed at 2.5 Tablespoons per Gallon of water (I use distilled, bottled) and marbling alum (again, not the food kind) mixed at 1 to 2 teaspoons per cup of water. I mix my alum a bit stronger than some recommendations just because I find it works better for me. The carrageenan is mixed in a high-speed blender and allowed to sit overnight.  I usually mix the alum at the same time just because it’s one less step to do in the morning! The alum just needs to be stirred a bit to dissolve.

Paint
Paints can be tricky and you need to be willing to play a bit to find the brand and type that suits you purposes best. I have been converted to Golden’s Fluid Arcylics. I think they are easier to balance, have great pigment integration and provide intense colors. However, like all paint, they can be highly individual in the way you mix them. I start my paints with 1 part paint to about  1/2 part water and add water gradually to find the right balance. Colors vary a lot – blues & greens need more water, reds and yellows need less.  Unlike the paints I used to use, even the toughest of the Golden colors needs only 20 to 30 stirs to create a good suspension and most need way less.  I took a class where the paints had been pre-mixed and even though they were the same base paint that I use all the time, the water ratios were very different and it took a few papers for me to adjust my style to the paint. The moral is play, test, try and play some more until you find what suits you and how you plan to use your paper.

I use a piece of dowel to mix the paint.  It’s tempting to just use the eyedropper, but not wise.  I used to use plastic spoons, but find that the dowel provides a better surface for reintegrating pigment that has fallen out of suspension. Some paints, especially yellows and reds, rarely fall, but blues and ultramarines have to be stirred frequently.  Metallics need stirring before almost every drop and the dowel provides a pestle-like action that works well. I much prefer using cups to leaving the paint in the bottles. Bottles will develop a thick sludge of pigment on the bottom, but with the cups you can see and control the sludge formation. I’ve used both snap lid and twist on cups and prefer the twist closure. It gives a tighter seal and avoids the splash episodes when I try to open a stuck snap-on lid! You do have to take care that the twist is fully sealed if you are leaving the paint for any period of time.

Paper

What paper you use depends entirely on what you plan to do with your marbled paper.  Always keep end use in mind.  Most of my paper ends up in my books; that’s why I started marbling in the first place.  Therefore, I use a lot of drawing weight paper (70-80lbs, 100 – 130gsm). I also use a lot of card stock (65lb., 167 gsm.) for cards and for some book uses, but it is too heavy for endpapers.  I have some beautifully marbled sheets of very heavy weight paper and even watercolor paper (400 lb.) that I love, but have yet to figure out what to do with them.  Many marblers love Texoprint paper, but I am not a fan, partially because I don’t like the way it pastes down.  I have tried marbling everything from paper napkins to mat board. So try, experiment, play!  If you are just beginning, I suggest either a 70lb. drawing paper or card stock as they are both easy to handle and have many uses.

Fun sources of marbling paper are everywhere – discarded books, maps, old magazines, sheet music,  junk mail, community flyers.  Just look around.  Slick and glossy papers are harder to marble since both the alum and paint tend to slide off, but you can have fun trying!

…. Continued on THIS PAGE


11 Comments

Filed under Marbled Paper

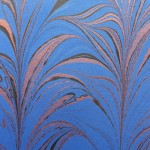
Marbling with a Double Rake or Bouquet Comb

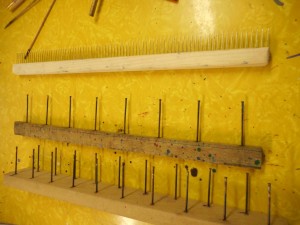
Just a few weeks ago I finally decided to buy a double rake or marbling comb so I could create a proper bouquet pattern.  Last week I carved out some time to set up the trays and try it out. Here’s what it looks like:

Regular comb on top, single rake, and double rake on the bottom

Regular comb on top, single rake, and double rake on the bottom

First I’ll show you the results of my play and then talk about it.

I had fun playing with the bouquet pattern in various sizes but I was limited in what I could do by the size of the comb in my tray.  There wasn’t much leeway for the comb to go back and forth across the tray as it would hit the sides pretty quickly.  I just now realized I should have tried it the other direction in the tray.  Maybe next time!  I like the results on a fine-combed nonpareil pattern, but not over a wider nonpareil, like the red and yellow piece in the middle above.  The spikes of the ” wrong way” bouquet (raked from the bottom up instead of the top down) are interesting, but not spectacular.  I tried “tying” the bouquet by running a wide rake horizontally across the pattern.  I liked the contrast of a straight line against the multiple curves of the bouquet, but it only worked with some of the color combinations.  I’ll definitely have to play a bit more.  Over all, I don’t think it’s going to become a favorite pattern. I like the way it looks, but it’s rather boring to make, a little like the nonpareil.  Except with the nonpareil there’s always the challenge of getting it perfect because any minor flaw, like a caught hair or paint fleck, really stands out.  The nonpareil can also go in so many different directions: It’s just the beginning point of so many patterns.  I thought when I started this session, I would only do bouquet patterns, but as you can see from the photos, other patterns kept creeping in.  Certain color combinations just demanded a different treatment!

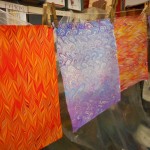
Had an interesting thing happen near the end of the session.  I was using the eyedropper to apply the paint and one of the colors suddenly went spiky on me.  This usually means something is contaminated. I usually find contamination in the carrageenan and it is normally confined to one area of the tray, but this was definitely the dark blue paint. I think it was Prussian Blue.  Instead of stopping and trashing that tray, I kept on going.  The next colors dropped in perfect circles.  I wish I’d taken a picture – perfect circles except for the dark blue spikes.  As soon as I started working with the stylus, the contamination spread and all the colors went crazy.  I played with it and printed it anyway. I skimmed the carrageenan well and produced a perfect nonpareil. The next tray after that was rubbish!  You can see the sequence of papers on the line from right to left.  I was working with smaller paper so there were two sheets laid down per tray.

Something like this always tells me it’s time to stop.  The only solution to bad contamination is to throw out the size or the paint and start again. Neither can last forever!

8 Comments

Filed under Marbled Paper

Minimalist Marbling

When I marble I usually have a dozen or more colors going by the third day.  I love color and I just keep adding another shade of blue or an accent of yellow.  For my last marbling session, I decided to try something completely different.  I had done some monochrome marbling before, but I had used four or five different variations – cobalt blue, Prussian blue, cyan, ultramarine blue etc. This time I used just one color plus black and white, or in a few cases, brown and white. I cheated a bit with the blue and used Cerulean blue, deep and Cerulean blue, chrome, but otherwise there was just one color.

It’s easy to get lots of shades in marbling because the paint spreads across the surface of the carrageenan and the more it spreads, the lighter it is.  As more and more paint is dropped, it spreads less and less. The first paint dropped gets compressed and so gets darker.

Some pictures of my fun time:

Cleaning up is much easier when I only use three colors!

Leave a Comment

Filed under Marbled Paper

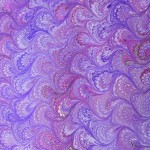
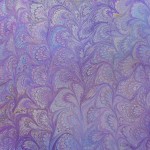
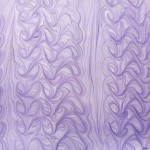
Fifty Shades of Purple

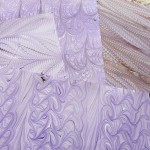
Last week I had a wonderful marbling session!  After the angst of the last carrageenan disaster, I was a little bit worried about starting one, especially as I had a special order to work on.  Specials are always a combination of fun and dread.  Fun – to be working with someone else’s ideas and color palette, and dread that I’ll mess it up. This time the theme was purple, specifically toward the blue end of purple rather than the red.  In looking over my colors, I realized that I had several red purples but only a tiny bit of Ultramarine Violet. I quickly ordered some and decided to try mixing some.  Mixing colors when marbling is always a challenge for me.  Some blend very nicely and float well, but others just don’t. Probably has something to do with the chemical makeup, specific gravity or density of the pigment. No clue.  Anyway, this time it worked!

Here are my purples, maybe not quite 50 shades, but a couple dozen!

I did finish up with other colors and some fun.

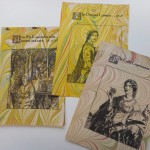
The first photos show some of the other colors I played with at the end of the session. The rest of the photos come from  spoiled copy of a fashion and pattern magazine for August 1898.  The incredible wasp waists fascinated me.  I can’t imagine having to wear them. I love the color prints and don’t know what to do with them.  I’m not going to marble them!  The ones I did marble were black and white.  The last two images are from my odds and ends. The first is from a Children’s magazine, “The Chatterbox”, which has lots of sad tales full of tragic heroines and Victorian morals. The last is the back cover of sheet music printed in 1915.  Fun combination of interesting stuff!

To finish the week, I finally completed five little books I had started a while ago using the trimmings from larger books.  All of them are roughly 4″ x 4″ and to make up for their small size, I made them thicker than I usually do.  Even though they take almost as long to make as their bigger sisters, I find these fun projects.

Like the hearts and flowers!  The tools and the garlands have leather spines.

3 Comments

Filed under bookbinding, Marbled Paper

Interesting Carrageenan Disaster

I’ve been marbling on a regular basis for seven or eight years now and I’ve never had problems with my carrageenan until last summer. Problems with paint, with paper, with alum, but I didn’t even think about the carrageenan; it was always reliable. Last summer I had minor problems with it starting to break down after only a day or two, but I blamed it on the heat and moved on.  Last week, I finally had time for my first marbling session in months and I was already to go when I hit a real stopper.

It went like this.  The night before, I set up my marbling space, hung my drying lines, chose my paints, mixed the alum and mixed the carrageenan, just as I always do.  Two and a half Tbsp. to a gallon of water, two gallons in all.  I use distilled water because I have an incredible amount of stuff – iron, calcium, sulfur, and more – in my well water.  As usual, I used the same blender to mix it and poured it into my marbling tray to sit overnight.

The next morning, I alummed some paper, mixed my paints and was ready to go. As soon as I skimmed the carrageenan, I could tell something was different. It was much thicker than it should have been and was very uneven. Using a stylus and my rake, I swirled them through the tray to try to even up the liquid.  I decided to throw some paint to see what would happen and this is what I got:

I rather like the wildness in the first two pieces, but it’s not exactly marbling!  As you might imagine, I was getting upset as skimming and stirring didn’t seem to help. Slowly I realized that there were big lumps of carrageenan throughout the tray and that was the problem. I thought about putting the carrageenan through the blender again or just tossing this batch and starting fresh the next day.  I tried breaking the lumps with the rakes and that helped and I found that dragging the comb from the top of the tray to the bottom caught the lumps in the tines, so I started straining out the lumps and bit by bit the carrageenan became smoother and smoother.

As I got rid of the lumps, marbling improved, but it was still very iffy.  I was able to pull some pretty good pieces, but I was still straining lumps out after every skim.  That created a problem of its own.  It was thinning out the remaining carrageenan and, instead of crisp marbling edges, I was getting very soft fuzzy borders.  I did finish up that day, but that night I took out an old packet of carrageenan from a different source and mixed a new batch for the next morning.

I still don’t really know why this disaster occurred.  It could have been that I lost count and added an extra Tsbp. It could have been mixed too little or too much. It could have been due to cold temperatures that night. It could have been some contamination in the carrageenan powder.  I just don’t know, but it was very frustrating!

Next morning I had brand new carrageenan and a brand new tray and marbling went well. In fact things were going so well that I kept on for another three days and I had lots of fun playing with overmarbling, ripples and got back in touch with marbling just for fun. Lots of pictures of my play.

In total I had almost 100 pieces – good, bad and indifferent – by the end of the session.

Now, I want to do it again!

But, before that, I have to have a bunch of plumbing replaced right over my work area.

NOTE:  Clear acrylic frames come in many sizes and make great, inexpensive marbling trays. Just remember to test how well they hold water before using.  If they leak, plumber’s Goop or other sealant will seal the edges.

23 Comments

Filed under Marbled Paper

Updates

I’ve just updated my page on Building a Scrapbook and tomorrow, the books should be finished.


Textblock is placed inside cover

Textblock is placed inside cover

I’ve also written a bit more in the Problems of the Marbling Kind about paint

Getting the paints balanced perfectly with your size can be very tricky.  One of the most obvious problems is having the paint contract into a tiny ball and drop to the bottom of your tray.  This happens when the paint is too thick or heavy in relation to the size.  The solution is usually to add more water to the paint, a few drops at a time.  Alternatively, a surfactant can be added to the paint.  … for more see above link.

Silver granulation

Silver granulation

Leave a Comment

Filed under bookbinding, Marbled Paper

Problem Encounters of the Marbling Kind

One of the most satisfying experiences I have when I’m marbling is hanging a finished sheet and realizing it is perfect.  It doesn’t happen as frequently as I’d like, but it does happen.  There are so many things that can go wrong and so many variants that sometimes it’s hard to figure out where the problem occurred. After all the papers are dry at the end of a marbling session, the first thing I do is to sort my papers into piles – saleable,  usable, disaster and that rarity, perfect.

For my own clarification and maybe to help new marblers, I am going to try to look at the places where marbling can go wrong and maybe how to fix it. This will probably take several blogs and may be interspersed with other commentary.

PAPER
First comes the paper. You can marble almost any kind of paper, but the results will vary. I’ve only had two total disasters. The first was a very slick brochure, both the alum and paint tended to slide off . Some color did stick, but it was very messy.  Slick magazine pages are very iffy, they might work, but they might not. The second wipeout was a heavy “cloth-like” paper napkin.  It lay down on the tray well, but just wasn’t strong enough to hold the paint.  When I lifted it from the marbling tray, it shredded.

Different weight papers may require slightly different techniques. I tend to catch bubbles on heavier papers because they don’t roll down as smoothly. If I switch paper weights, I find I have problems with the first ones until I get into the right rhythm. With anything that doesn’t bend, like mat board, I dunk the starting corner to keep the rest going smoothly. Antique paper, like pages from 19th century books, can be marbled if you handle it gently. It may need to be laid flat on a towel to dry, rather than being hung. Hanging weak paper, of any age, may tear the corners. Although I always rinse my marbling before hanging, I’ve found that a residue of carrageenan remains on the paper  which seems to strengthen old paper. Another quirk I’ve noticed is that slightly acidic paper seems to produce brighter and crisper marbling. Almost all the the new paper I buy is acid-free, but I have stashes of print and watercolor paper that belonged to my Mother and they all have some acid content, as do the maps and book pages I use.

For my standard marbling, I use Strathmore or Canson drawing paper. For use in my books, I try to stay within the 90gsm to 120gsm range.  For cards, I use standard card stock.  I have some lovely pieces on very heavy weight paper, but haven’t figured out a use for them yet, other than framing! When I need a large colored paper, I use Pastel paper, either Strathmore or Canson Mi-Teintes.

ALUM
I’ve read many times that you should not use grocery store alum for marbling, but only buy that expressly labeled for marbling.  Guess what? They are right.  I had to try some from a bulk food store that was just labeled “alum”, not “pickling alum”.  It did work, but I had a lot more papers that had alum streaks than usual.
Problems with alum are pretty easy to spot. If there are grainy, greyish spots or spots where there is washed out color, it’s probably due to an incomplete application of alum. The predominate problem I’ve had with alum, however, is user generated. I use the non-alumed side by mistake.

CARRAGEENAN
I’ve had few problems related to the carrageenan overall.  The proportions are important as is the blending time.  I use 2.5 Tbs. per gallon of water and blend for at least one minute. (I have very hard well water so I use bottled distilled water. Most people can use tap water.) It can last for up to a week, but I did have one batch that started breaking down after two days.  Sometimes it is hard to distinguish between a paint problem, a carrageenan problem and general contamination.  In one particular case, I’m pretty sure it was just the carrageenan, because I mixed a new batch and the next day the same paint was fine. Contamination in the tray can usually be solved by a good skimming.  Just be careful to skim only on the top. If you dip too far into the carrageenan, you risk recirculating all sorts of bad stuff that has sunk to the bottom of the tray. Since all marbling takes place only on the top surface, what’s underneath can’t hurt, usually.  You can tell that the carrageenan is “worn out” if the problems affect all the colors. It also seems to manifest with globs with squarish sides rather than the rounder dots from paint problems.  The only solution for over-used carrageenan is to toss it and start again.
By the way, dirty carrageenan is Okay. In fact, it seems to work better after having a bit of paint in it.

UPDATE:  See my blog on “An Interesting Carrageenan Disaster” for a real problem I encountered.  In hindsight, I think I must have mismeasured the carrageenan and added an extra tablespoon.

PAINT

If you are planning to do a lot of marbling or marbling something special, it pays to start with quality paint.  I use Golden Fluid Acrylics because of their high pigment to carrier ratio. That means more intense colors even when the paint is thinned. They come in a wide range of colors and in several size bottles. Start with the 1 oz. size.  When you are using paint one drop at a time, you can do a lot of papers with 1 oz. Since you want the paint to float easily, avoid any “heavy body” paints. You should also avoid any paints meant for children. The cheaper paints have less pigment and can be unevenly blended causing problems for marblers.

Getting the paints balanced perfectly with your size can be very tricky.  One of the most obvious problems is having the paint contract into a tiny ball and drop to the bottom of your tray.  This happens when the paint is too thick or heavy in relation to the size.  The solution is usually to add more water to the paint, a few drops at a time.  Alternatively, a surfactant can be added to the paint.  I use Golden’s Acrylic Flow Release. Photo-Flo from Kodak can be used and marbling gall is used with watercolors.  Getting colors to spread instead of drop is usually just a matter of patience and trial and error.  I haven’t found a solution to the opposite problem, when a single drop of paint fills the entire tray! Reds and yellows are especially prone to spreading. To reduce the spread, you can try to add more paint, but I’ve found it’s easier just to start over with fresh paint and add water just a drop at a time until you have the right consistency.  I always mix very small amounts of paint to start so I don’t feel badly if I have to throw some out. Unlike painting, marbling is a matter of drops, not huge amounts.

Some paint will always drop out, at least it always does for me, but at the end of a session, the bottom of your tray should not be coated with a build-up of paint. Some scattered drops are normal.

A common problem I have is the paint granulating or stretching apart into tiny particles. This is especially noticeable when using metallics, but it happens with other colors. I haven’t found a real cure yet, but repeated stirring seems to help keep the pigments in suspension.  Just don’t stir so vigorously that you make bubbles. They are a real pain to eliminate.

If you click on the photos and examine the larger size, you can see where the paint has begun to break down. The finer I make the lines in the pattern, the more break down occurs. In some instances, like the silver and blue, the effect is gossamer, sparkly strands; in others, it is just a mess! The less you manipulate the colors, the less break down.

USER ERROR

Of course the most frequent source of problems is just me, especially in laying down the paper. All sorts of messes can occur, but air bubbles caught between the paper and the size are my most frustrating problem.  I have a gorgeous pattern in the tray and then a big bubble ruins it.

Hesitation lines are another problem I have on a regular basis. The lines occur when your paper isn’t placed on the paint in a smooth motion. Where you hesitate or jerk your hands, a line of paint forms.  This can be a desired result when you are making a ripple or moire pattern. I frequently have problems with the last corner and there’s a little line right there.  Hesitation lines are one of the reasons I don’t usually work with paper larger than 14″ x 17″. I’m short, my arms are short and stretching over a larger tray with longer paper results in lots of dips and lines.

More examples to come.

To be continued …

113 Comments

Filed under Marbled Paper

Addendum to Overmarbling

I was doing some more overmarbling yesterday.  I have become addicted to it! I thought it would be interesting to have a complete record of the layers, so I took pictures of the original sheet, the overmarbled sheet and a smaller plain sheet that was marbled in the same tray as the overmarbling.

Here are the results.

Be sure to click on the photos so you can see the details of the overmarbling.

Fun, isn’t it? 

Leave a Comment

Filed under Marbled Paper