Design Decisions = Fun and Frustration

During the last week or so, I’ve been mulling over what to do with all the metal goodies

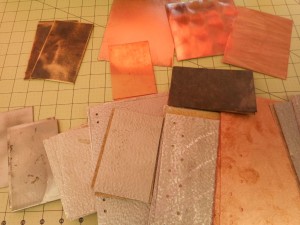
I have. If you don’t remember, this is the pile.

DSCN0001

I’m concerned about adhering anything, leather, cloth, tapes, etc., to the metal as it will need a strong bonding agent.  The ability of any material to withstand constant contact with metal may be another problem. For example, in a Coptic binding, how quickly will the metal cut through the binding thread? I’ve smoothed and rounded the edges and corners, but will it be enough? Will I have to cover the edges with a softer material?  So far lots of questions, no answers. This is what I have planned out, now to try to find out what will work.

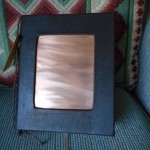
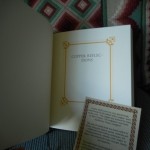
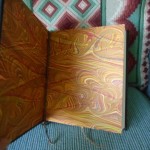
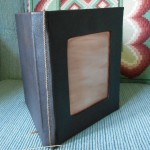
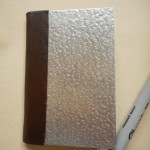
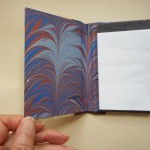
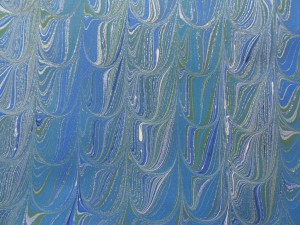
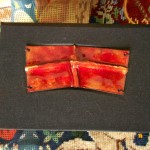
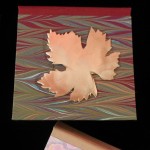
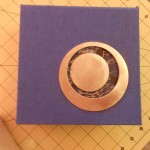
These two have already been finished.  The book cover was made by creating a “sandwich” of two pieces of binders’ board with the copper plate in the middle.  The center of the top board was cut out, exposing the copper. This is one of the easiest and most secure methods of using metal, but it is essentially just decorative, not an integral part of the structure of the book. For the small notepad, I glued the metal directly to the leather spine using a metal adhesive. There were remnants of adhesive webbing on the reverse of this aluminium, so I just used PVA on the marbled paper.  This is a prototype and it will take some testing in use to see if the leather needs reinforcing or if other adhesives are needed.  I decided to do this one as simply as possible to test the strength of the bonding.

Now for what’s in planning stages:

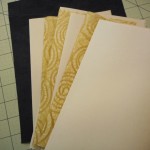
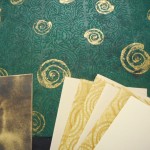
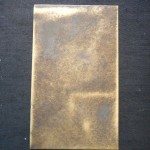
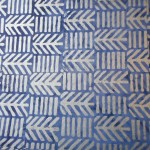
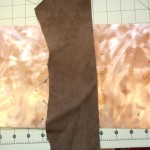
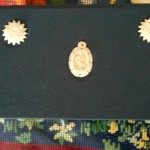
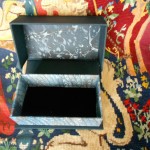
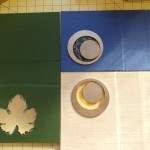
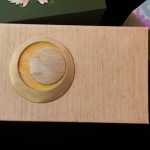
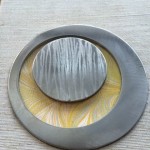
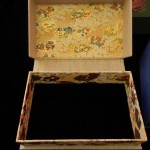
These two lovely brass plates were originally intended to be front and back covers, but while playing, I changed my mind. I tried them with a dark brown leather, but much preferred the look against a black Italian bookcloth.  Sam Castner textured these for me and I really like the edges, so instead of making a sandwich as I did for the copper, I’m going to inset one into a book cover.  To inset, I’ll carve a piece out of the top board just slightly larger than the brass. The boards are then covered with bookcloth, which is pressed into the depression, and the brass is adhered as the final step.  The green decorative paper will be used for endpapers and the lacy tissue makes section dividers.  The other brass piece will be inset into a clamshell box that will be made to fit the finished book.

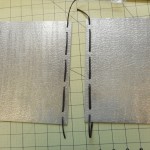
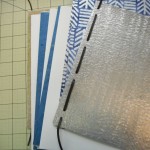
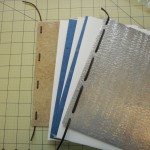
Although I don’t care for Coptic bindings in general, I thought I would try at least one and the holes were punched on these plates for Coptic sewing.  I’ve added a leather lacing just for decoration.  I’m going to sew this with a heavy waxed thread, but really expect the metal to cut through it.  It’s worth trying on a prototype anyway.  Sewing on cords that are laced into the cover will probably be a better technique.

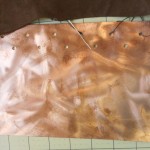
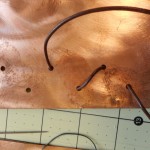
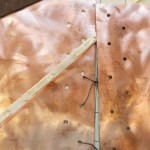
I’m completely undecided about this last piece.  I love the copper plates and want to use them as the boards for a book, but I have no clue as to how I’ll construct the spine.  At the moment, I’m thinking about a leather covering over wrapped cords. Maybe using rawhide or leather thongs for the cords and lacing them into the copper.  The holes in the copper can be used structurally or just for decoration.  They could be covered with leather or bookcloth or left exposed. Not sure of anything, just know I love this copper and will have to find an appropriate venue for it.

Leave a Comment

Filed under bookbinding, Craft design

Updates

I’ve just updated my page on Building a Scrapbook and tomorrow, the books should be finished.


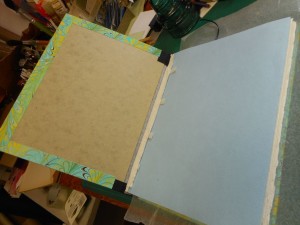
Textblock is placed inside cover

Textblock is placed inside cover

I’ve also written a bit more in the Problems of the Marbling Kind about paint

Getting the paints balanced perfectly with your size can be very tricky.  One of the most obvious problems is having the paint contract into a tiny ball and drop to the bottom of your tray.  This happens when the paint is too thick or heavy in relation to the size.  The solution is usually to add more water to the paint, a few drops at a time.  Alternatively, a surfactant can be added to the paint.  … for more see above link.

Silver granulation

Silver granulation

Leave a Comment

Filed under bookbinding, Marbled Paper

Scrapbook Construction

In the past few years, several people have asked if they could use my blank books as  scrapbooks.  My answer has always been an emphatic, “No!” Inserting extra thickness into any tightly bound book will sooner or later break the spine. With a Coptic or long-stitch binding there is a bit of leeway, but as soon as the boards or covers move beyond being parallel, the hinges are put under stress and will break.

The goal in building this type of book is to accommodate extra thickness between the pages while using a strong binding structure that will support extra weight.  I, personally, don’t like making scrapbooks: they tend to be large and I like small. The pages are difficult to sew and the endpapers can be a pain, I am documenting my progress on the page “Building a Scrapbook” if you are interested in the nitty gritty.  I’m still working on the books and will be updating the page as I progress.

On another matter entirely, I recently stopped by Sam Castner’s workshop and came away with some fabulous ideas and these:DSCN0001

Now I have to get to work designing and making!

Leave a Comment

Filed under bookbinding, Craft design

Problem Encounters of the Marbling Kind

One of the most satisfying experiences I have when I’m marbling is hanging a finished sheet and realizing it is perfect.  It doesn’t happen as frequently as I’d like, but it does happen.  There are so many things that can go wrong and so many variants that sometimes it’s hard to figure out where the problem occurred. After all the papers are dry at the end of a marbling session, the first thing I do is to sort my papers into piles – saleable,  usable, disaster and that rarity, perfect.

For my own clarification and maybe to help new marblers, I am going to try to look at the places where marbling can go wrong and maybe how to fix it. This will probably take several blogs and may be interspersed with other commentary.

PAPER
First comes the paper. You can marble almost any kind of paper, but the results will vary. I’ve only had two total disasters. The first was a very slick brochure, both the alum and paint tended to slide off . Some color did stick, but it was very messy.  Slick magazine pages are very iffy, they might work, but they might not. The second wipeout was a heavy “cloth-like” paper napkin.  It lay down on the tray well, but just wasn’t strong enough to hold the paint.  When I lifted it from the marbling tray, it shredded.

Different weight papers may require slightly different techniques. I tend to catch bubbles on heavier papers because they don’t roll down as smoothly. If I switch paper weights, I find I have problems with the first ones until I get into the right rhythm. With anything that doesn’t bend, like mat board, I dunk the starting corner to keep the rest going smoothly. Antique paper, like pages from 19th century books, can be marbled if you handle it gently. It may need to be laid flat on a towel to dry, rather than being hung. Hanging weak paper, of any age, may tear the corners. Although I always rinse my marbling before hanging, I’ve found that a residue of carrageenan remains on the paper  which seems to strengthen old paper. Another quirk I’ve noticed is that slightly acidic paper seems to produce brighter and crisper marbling. Almost all the the new paper I buy is acid-free, but I have stashes of print and watercolor paper that belonged to my Mother and they all have some acid content, as do the maps and book pages I use.

For my standard marbling, I use Strathmore or Canson drawing paper. For use in my books, I try to stay within the 90gsm to 120gsm range.  For cards, I use standard card stock.  I have some lovely pieces on very heavy weight paper, but haven’t figured out a use for them yet, other than framing! When I need a large colored paper, I use Pastel paper, either Strathmore or Canson Mi-Teintes.

ALUM
I’ve read many times that you should not use grocery store alum for marbling, but only buy that expressly labeled for marbling.  Guess what? They are right.  I had to try some from a bulk food store that was just labeled “alum”, not “pickling alum”.  It did work, but I had a lot more papers that had alum streaks than usual.
Problems with alum are pretty easy to spot. If there are grainy, greyish spots or spots where there is washed out color, it’s probably due to an incomplete application of alum. The predominate problem I’ve had with alum, however, is user generated. I use the non-alumed side by mistake.

CARRAGEENAN
I’ve had few problems related to the carrageenan overall.  The proportions are important as is the blending time.  I use 2.5 Tbs. per gallon of water and blend for at least one minute. (I have very hard well water so I use bottled distilled water. Most people can use tap water.) It can last for up to a week, but I did have one batch that started breaking down after two days.  Sometimes it is hard to distinguish between a paint problem, a carrageenan problem and general contamination.  In one particular case, I’m pretty sure it was just the carrageenan, because I mixed a new batch and the next day the same paint was fine. Contamination in the tray can usually be solved by a good skimming.  Just be careful to skim only on the top. If you dip too far into the carrageenan, you risk recirculating all sorts of bad stuff that has sunk to the bottom of the tray. Since all marbling takes place only on the top surface, what’s underneath can’t hurt, usually.  You can tell that the carrageenan is “worn out” if the problems affect all the colors. It also seems to manifest with globs with squarish sides rather than the rounder dots from paint problems.  The only solution for over-used carrageenan is to toss it and start again.
By the way, dirty carrageenan is Okay. In fact, it seems to work better after having a bit of paint in it.

UPDATE:  See my blog on “An Interesting Carrageenan Disaster” for a real problem I encountered.  In hindsight, I think I must have mismeasured the carrageenan and added an extra tablespoon.

PAINT

If you are planning to do a lot of marbling or marbling something special, it pays to start with quality paint.  I use Golden Fluid Acrylics because of their high pigment to carrier ratio. That means more intense colors even when the paint is thinned. They come in a wide range of colors and in several size bottles. Start with the 1 oz. size.  When you are using paint one drop at a time, you can do a lot of papers with 1 oz. Since you want the paint to float easily, avoid any “heavy body” paints. You should also avoid any paints meant for children. The cheaper paints have less pigment and can be unevenly blended causing problems for marblers.

Getting the paints balanced perfectly with your size can be very tricky.  One of the most obvious problems is having the paint contract into a tiny ball and drop to the bottom of your tray.  This happens when the paint is too thick or heavy in relation to the size.  The solution is usually to add more water to the paint, a few drops at a time.  Alternatively, a surfactant can be added to the paint.  I use Golden’s Acrylic Flow Release. Photo-Flo from Kodak can be used and marbling gall is used with watercolors.  Getting colors to spread instead of drop is usually just a matter of patience and trial and error.  I haven’t found a solution to the opposite problem, when a single drop of paint fills the entire tray! Reds and yellows are especially prone to spreading. To reduce the spread, you can try to add more paint, but I’ve found it’s easier just to start over with fresh paint and add water just a drop at a time until you have the right consistency.  I always mix very small amounts of paint to start so I don’t feel badly if I have to throw some out. Unlike painting, marbling is a matter of drops, not huge amounts.

Some paint will always drop out, at least it always does for me, but at the end of a session, the bottom of your tray should not be coated with a build-up of paint. Some scattered drops are normal.

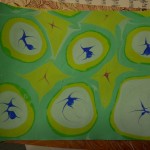
A common problem I have is the paint granulating or stretching apart into tiny particles. This is especially noticeable when using metallics, but it happens with other colors. I haven’t found a real cure yet, but repeated stirring seems to help keep the pigments in suspension.  Just don’t stir so vigorously that you make bubbles. They are a real pain to eliminate.

If you click on the photos and examine the larger size, you can see where the paint has begun to break down. The finer I make the lines in the pattern, the more break down occurs. In some instances, like the silver and blue, the effect is gossamer, sparkly strands; in others, it is just a mess! The less you manipulate the colors, the less break down.

USER ERROR

Of course the most frequent source of problems is just me, especially in laying down the paper. All sorts of messes can occur, but air bubbles caught between the paper and the size are my most frustrating problem.  I have a gorgeous pattern in the tray and then a big bubble ruins it.

Hesitation lines are another problem I have on a regular basis. The lines occur when your paper isn’t placed on the paint in a smooth motion. Where you hesitate or jerk your hands, a line of paint forms.  This can be a desired result when you are making a ripple or moire pattern. I frequently have problems with the last corner and there’s a little line right there.  Hesitation lines are one of the reasons I don’t usually work with paper larger than 14″ x 17″. I’m short, my arms are short and stretching over a larger tray with longer paper results in lots of dips and lines.

More examples to come.

To be continued …

113 Comments

Filed under Marbled Paper

Beads in Flame, Addendum

Here are the photos I promised from the bead course. Unfortunately, I didn’t take any photos of people working on beads or lit torches.  That part is left to your imagination!

This is the enameling & glass studio, rustic on the outside and packed on the inside. There are eight student stations with a touch in front of each.  The crock pot in the center of the table is used to keep small beads warm until they can be annealed in a kiln. Large beads go directly into the kiln.

After the beads are formed on the mandrels, they are placed in the annealing kiln, which is kept at 950F until full and then allowed to slowly cool overnight.  In the morning, the kiln is opened and the beads removed like a bouquet of blooms. Beads are removed from the mandrels, cleaned and made into jewelry or just admired.

Final showing before leaving for home.

Leave a Comment

Filed under Other crafts

Beads in Flame

Last week my granddaughter and I attended the John C. Campbell Folk School’s Intergenerational week for the third time.  The first time, we took a course in wood carving, the second year was enameling and this year was creating lamp-work beads. Unfortunately, all my pictures of the class and the process are on my granddaughter’s phone and she is in a WiFi  and cell free zone for another week. You’ll have to be satisfied with a few pictures of the finished products for this blog.

The process of making beads requires concentration and coordination. A few seconds distraction can produce a lump of molten glass on the bench rather than a bead on the stainless steel stick  (mandrel).  Unlike the torch fire enameling I did last year with a hand-held torch, the smaller torch used in lampwork is fastened to the bench and both hands are used to make the bead.  That’s where the coordination comes in.  One hand holds the glass rod that is being melted to form the bead. This hand is moving constantly to make a blob or “gather” of  melting glass at the end of the rod as well as moving the glass in and out of the flame to keep it at the desired temperature.

The other hand holds the mandrel, where the bead will be formed. Once a gather is the correct size, it is carefully attached to the mandrel.  From then on the mandrel is constantly rotated to keep the bead even .  This is just for a plain bead!  Adding colors, dots, lines and other embellishments requires careful judgement and movement.  If a bead is heated or cooled too quickly it will crack or even explode.  Good depth perception is also useful to keep everything just where you want it in relation to the flame as bead and the rod need to be cooled slightly at times and heated at others.

My granddaughter and the rest of the class were able to coordinate all the movements well by the second day.  I had trouble keeping the right hand rocking back and forth while the left hand was rolling clockwise. My beads tended to become oval as the left hand rocked instead of rolled. 

Glass rods come in a myriad of colors, both opaque and transparent.  It was great fun playing with the colors and especially the combination of clear and solid.  Some of my favorite designs were on beads that broke in the annealing process.  I’d love to have the luxury of just spending hours by myself honing the techniques and really developing a fluency in the art. In reality, I have paper to marble, boxes to design and books to make.  Maybe some time …

In the meantime, here at home things were growing and growing.  Here are some new pictures of my garden and herb patch.


Herbs are a bit overgrown and need edging, but they are lush due to all our rain.  Tomatoes are slowly ripening – haven’t had enough sun, but the cherry tomatoes are beginning to come on. Delicious!  I’m not doing pickles this year so there aren’t many cucumbers, just enough to eat.

I’ve ordered a batch of paper and paints for some special orders and am planning to get back on track with marbling next week!  If it happens, I’ll be blogging my progress.


Leave a Comment

Filed under Life, Other crafts

Parsley, Sage, Rosemary and Thyme

About ten years ago, shortly after I moved into this house, I started an herb garden in the middle of my side lawn.  I’m not quite sure why I put it there. As it has grown over the years it has become difficult to mow around.  Not planned well at all!  It is, however, convenient to the kitchen and, since planning doesn’t seem to be my strong point, close enough to run out and grab some parsley or chives on those rare occasions when I actually cook.  I love growing herbs, but I really don’t use them much, especially ones like borage and horehound and fennel.  They are pretty and smell good too!

My care of this garden has been very hit-and-miss.  I usually put in a few annuals like parsley and basil in the spring and see what comes up from the previous year.  I hate weeding, so by July, the patch is overgrown with the more invasive herbs as well as weeds and grass.  The last few years, I’ve been particularly lax and I had half sage bushes and half chives.  Several years ago, I did tear out all the tarragon which threatened to take over everything.  The past winter was so cold and so long that it spelled doom for most of the plants.  Only a few meager sage stems survived along with a tiny bit of thyme and, of course the chives.

In the face of such devastation, I decided I had to go back to the beginning, dig almost everything up and start fresh.  Unfortunately, Mother Nature had other plans.  Winter stayed and stayed and stayed.  The ground didn’t really thaw until April, followed by cold, raw weather and topped off by a huge storm and a flood that wiped out roads, basements and a house or two.  I’m on the side of a hill, so only lost part of my driveway, but the county highway crews estimate it will take months to repair all the damage.

Last week was the first opportunity for me to dig, plant, and redo the border.  I didn’t think I’d be able to do it. Since retiring more than ten years ago, I’ve found I can work at hard physical tasks for shorter and shorter lengths of time.  If I pace myself, I can do one session in the morning and one in the afternoon. Working around weather that was either too hot or too cold, also provided a challenge.  Here are some photos of my recreation of my herb garden.  These were taken before I really finished, but just this morning, I placed the last of the border stones, planted the last few herbs and finished mulching. Yes, I know the chives need to be cut back, but they are so pretty!  I’ll do it next week.

There’s a border of thyme all around the garden and I’ve used a couple of different varieties.  At a college where I once worked they had a “thyme clock”. It was a circular planting, like a sundial, with twelve divisions and a different kind of thyme in each.  I’ve forgotten what was used as the gnomon, but I always liked the idea and would love to be able to recreate it.

In the meantime, in the back yard, I was able to quickly put in my standard garden of tomatoes and cucumbers. Earlier, I had gotten from NYS Forestry Service some bare root crab-apple trees and had planted them near an apple tree that I had grown from seed.  I think it’s a Pink Lady, but not sure.

It still needs a lot of work, but at least everything is in the ground.

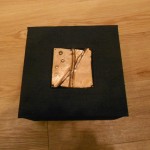
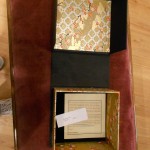
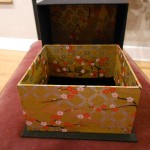
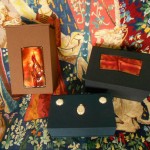
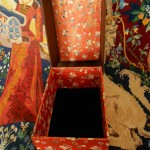
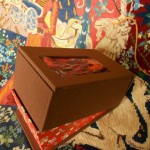
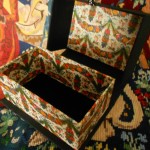
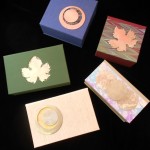
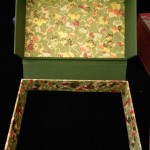
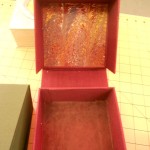
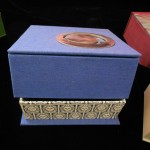
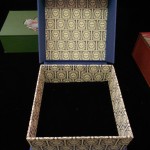
Meanwhile, in the basement, I was finishing up three more boxes. Two with detached lids and one clamshell.

The two lidded boxes have leather tops.  Leather had always been difficult for me to work, but I’m finally beginning to get it and enjoy working with it.

It’s really nice to have a week of finishing, instead of treading water.  Of course, without the previous prep work and first steps, there wouldn’t be any finishing!  This week, I hope to relax, mulch the garden and think about what’s next.


Leave a Comment

Filed under Boxes and Towers, Life

Addendum to Overmarbling

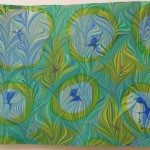
I was doing some more overmarbling yesterday.  I have become addicted to it! I thought it would be interesting to have a complete record of the layers, so I took pictures of the original sheet, the overmarbled sheet and a smaller plain sheet that was marbled in the same tray as the overmarbling.

Here are the results.

Be sure to click on the photos so you can see the details of the overmarbling.

Fun, isn’t it? 

Leave a Comment

Filed under Marbled Paper

Playing with Overmarbling

A few weeks ago, I had a marbling session that wasn’t going very well, not really badly, but I just wasn’t thrilled with anything. So, I decided just to have some fun by pulling out some old pieces and seeing if I could make anything out of them. Some were decent, but boring, others  had flaws and a few were disasters that I’m not sure why I even kept! One of my favorite things about marbling is that I never know exactly what a piece will look like when I lift it from the tray.  Will it have a bubble? Will it have a hesitation line? Will it be perfect? Will the colors match what I wanted?

When I overmarble, putting one layer of marbling on top of another, all bets are off.  I can never tell exactly how the two patterns or the two sets of colors will react with each other.  Rarely, I have something amazing, sometimes it’s dreadful, but it’s always interesting.

Here are some before and afters for some of the overmarbling I did.

I want to try this technique on a bunch of other pieces.  One technical note, I forgot that some of my early pieces had been done with watercolors rather than acrylics.  This means that some of the original paint  smudged or washed off when I tried to alum the piece.  I usually use a sponge to alum, but I might have been able to reduce the problem by using a spray bottle.  I now test a corner first to make sure the paint won’t bleed or smear.

In other news, I was finally able to start work on my garden.  I usually have it turned over by mid-April.  It’s May and I’m just starting.  It’s going to be small this year as I still have pickles from last year!  Lots of other outdoor work to be done and not much time.

Leave a Comment

Filed under Marbled Paper

Boxes with Steel by Sam Castner

In the summer of 2012, I started making portfolios and since then I’ve added three more sizes of notepad covers.  Back when I started making them, I had a conversation with myself trying to decide whether to make those or boxes.  This winter I’ve come back to the boxes.  I started with some clamshell ones with a piece of my enameling inserted in the top. You can see one here, if you scroll to the bottom.

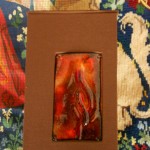
In December, before the deep freeze set in, I enlisted the help of Sam Caster, an accomplished metal artist, for ideas, encouragement and scraps. To my delight, Sam was very supportive and even willing to add his artistic touch in finishing my pieces.  For the past few months, I’ve been making more boxes to work with Sam’s designs.  We are finally ready to put some on the market! First are the ones with my enameling:

Then Sam’s work on stainless steel:

I’m planning on making these boxes to order to exactly fit people’s heirloom treasures, jewelry or wedding memories.  I think it will be a fun diversion from my books and a great use for all my paper!

I will be putting a few up on Etsy in the coming week and they will be available at the Arts Center.

Leave a Comment

Filed under Boxes and Towers, Craft design