Tag Archives: creating

30 in 30: Days 11 through 15

This is a continuation of the challenge that started in this post.
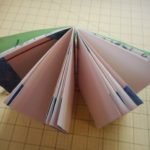
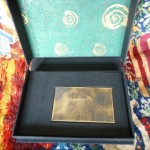
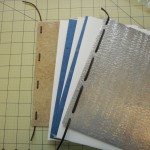
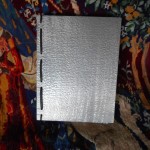
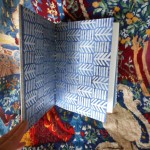
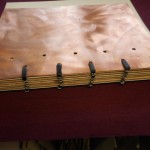
Day 11. Piano Hinge with Skewers

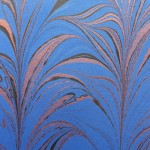
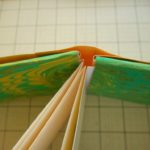
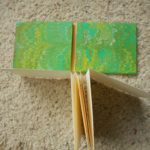
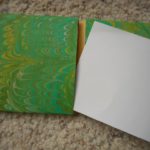
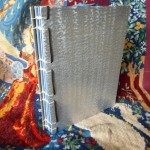
This was a fun book to make. I’m not sure about leaving the points on the skewers. I like the look, but they are sharp! I wrapped every section with my marbled paper, which means that you have two facing marbled pages on the interior between the sections. It also means that the back of the marbled paper is visible. I used 70 lb. (104gsm) drawing paper for the pages which makes the spine rather chunky. I think even a lighter weight paper might be better.  One problem, which isn’t really visible in the photos, is that the skewers make the spine very wide so the shoulders are way out of proportion.

Day 12. Flag Book

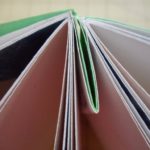
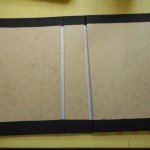
I’ve been intrigued by this structure for a long time, but have never gotten around to making one, partly due to a lack of ideas about content. The text or flags in this book are cut from random pages I had printed when I was playing with adding text to my books. The spine is folded decorative paper and is quite weak. If I ever make another one of these, I would use a stiffer paper or card stock for the spine.  I think thinner flags are more interesting. These are a little too wide.  Like many of these books, the final structure is a bit wedge shaped due to extra material at the spine edge. The shape makes shelving a problem.  The more I play with these different structures, the more I appreciate the advantages of the traditional codex book.

Day 13. Pocket X-Book revisited

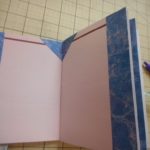
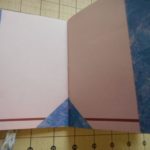
This is the same structure that I made on Day 2, just resized to hold business cards. This time I used a double-sided paper for the pockets so there isn’t a disconnect between the pocket and background. Filled with cards, it is much wider at the fore edge and needs some width in the spine to compensate and provide a flat profile.  I really like this format and think I may have another go at it using boards and a spine, but keeping the X-fold for the pockets.

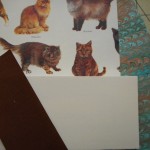
Day 14. Jacob’s Ladder variation

This is a modification of the Jacob’s Ladder toy/book that I made several years ago. It is larger and has only three panels, but it still flips and flops like the original. This structure demands content and I can imagine some quite clever uses of the six panels which seem to interact, but never do. In spite of all their flips and flops, the two Victorian ladies never meet.

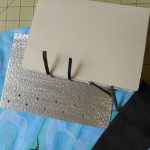
Day 15. Variation of my Jotter/Sketch book

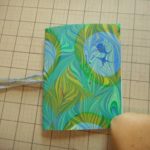
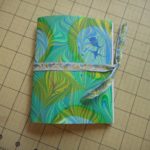
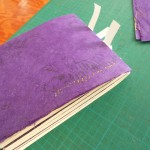
This is a slight variation of my jotters and sketch books. This isn’t an experiment with structure, but with material. I have many odds and ends of very heavy paper that I have marbled, but have never found an appropriate structure. It tends to crack if creased, but I was hoping I could use it in a structure that can use a gentle fold. It didn’t crack along the spine, but another problem appeared immediately – the covers wouldn’t lay flat. I tried damp ironing and leaving it in a press for 48 hours, but they still spring.  As a last ditch effort I will try to hydrate the paper thoroughly and then press it again.  I hope it works.

Thoughts on the Challenge so far.

It’s been fun and I’ve learned some new ways of handling paper, but it has also reinforced my desire to get back to “real” books.  Making these 15 books has taken me 23 days just because ‘Life’ and I don’t think it’s realistic to think I can continue that pace as I move into more complex structures. I have no desire to make 15 more simple ones, but I would like to work on what I would call intermediate types – stab stitch, Coptic, long stitch, etc.  but all of these structures require extensive prep work, cutting paper and boards as well as design time.  Books 16 – 30 (if I do that many) may become two days per book or three books a week or some other measurement. We’ll see what happens after my vacation. I should be back at this around the end of October.

Leave a Comment

Filed under bookbinding

30 in 30: Days 6 through Day 10

This is a continuation of my project started in this post.

Day 6.  Everlasting Fold Book

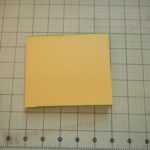
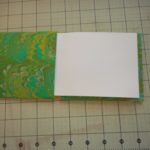
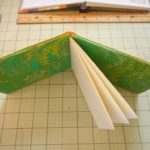
This book is called “everlasting” because the accordion-folded pages can be removed and replaced with with fresh pages when you are finished with them. It’s a clever idea, but I wish the spine were sturdier. I have a feeling that the pages will last longer than the case!  I used the plain yellow on the outside because I was confused by the instruction as to which paper would be seen.  If I were to make another one of these, I would try to figure out how to create a stronger spine, while retaining the ability to remove the pages.

Day 7. Foldout (map) Book

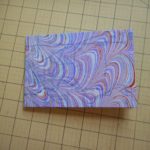
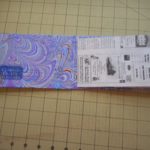
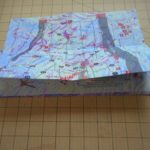
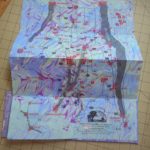
When I saw this design, I knew immediately I had to use one of my marbled maps for the text. It’s a good structure for any oversize piece that can be folded. If I make another one, I will marble the back side of the map with darker colors so the ads on the reverse aren’t quite so jarring. I might also add a ribbon tie or some other sort of fastening.

Day 8. Double Pamphlet Book

This is a nice sturdy little book that would be great for notes, grocery lists and other memos you still keep by hand and not on your phone. It it sewn with a pamphlet stitch through the two sections. The outside thread is hidden in the V fold made by the cover between the two sections. For the textblock, I used some letterhead paper that I liked, but could never use.  I have several more packs that you may see in future projects!  I like this variation on a very traditional structure. It is solid, compact and useful.

Day 9 & 10. Star Book.

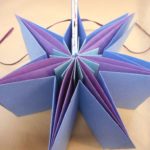
This book gets two days because it was more intricate than I thought it would be. I worked on it for three days, but some of that was drying and pressing time so I decided to call it two. Hey, I’m making up the rules as I go along and there are no grades at the end.

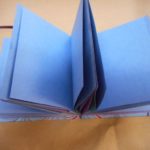
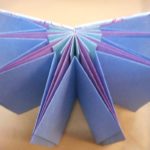
This is an interesting structure that could be used in many different ways by adding text, graphics, cutouts and more.  Unlike many other star structures which are accordion folded, this uses individual pieces which are glued at the points.  That’s why it took more time than I expected. Each of the solid-colored papers was cut into seven different-sized rectangles, folded and glued.  More labor-intensive, but more stable. At some point in this challenge, I will try one of the folded star books for comparison. The darker blue pages are folded on the top edge, except where I messed up, and can be flipped open a page at a time.  I can see a graphic artist using those in all sorts of ways – to hide text or artwork, as pop-ups, for individual poems or as pages in a longer narrative. One could even have text or art on the purple pages that could only be seen through an opening in the blue page.  Unfortunately, as I said before, I’m a structure person.


I’m planning on going on until Day 15 is finished and then taking a break. I’m going back to the John C. Campbell Folk School for another course and need to take time before then to batten down the house, finish turning over the garden and generally prep for the cold weather that is coming. Life does interfere with art sometimes.  I hope to be back to 30 in 30 by the end of October and blogging about it soon after.


Leave a Comment

Filed under Art, bookbinding, Craft design

Miniature Marbling, Miniature Books

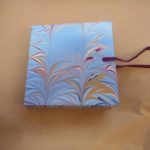
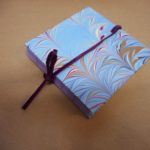
Last July my granddaughter and I attended the Intergenerational Week at the John C. Campbell Folk School as we’ve been doing for four years now.  It’s always great fun and great learning experiences.  This year, we changed it up a bit and also went to a weekend session (Friday evening through Sunday morning).  The topic was “Miniature Marbling” and it was taught by Pat Thomas. I’d taken another course from her and just couldn’t resist this one. She was gracious enough to let my granddaughter take the class with me in spite of her age. It was fun to concentrate on tiny marbling patterns, but what really clicked for me this time was the small 3″ x 3″ book and box.

I was very busy during the summer, but that little book was always in the back of my mind.  It was a quick binding – perfect bound with thread laced into  kerfs.  I, of course, wanted a “real” binding sewn over tapes and all.  I’ve done small books before, but have never quite thought miniature.  About a month ago, I finally had some play time in the studio and I started working with this idea. Here are a bunch of photos of the first batch with narrative captions.

Because of cutting errors and some sloppy measuring, I ended up with a few extra cases.  I didn’t want to waste them so reverse engineered books to fit.  Harder than I’d imagined just because I’m used to making the case to fit the book, not vise versa.  More photos of the second batch of books.

I had great fun making these even though they take almost as long as a normal sized book.  I hope I sell lots, so I can make more!

See them on Etsy in a few days.

Leave a Comment

Filed under bookbinding

Designing Boxes

I haven’t blogged in over a month, so it’s about time.  This winter has been unusual in many ways – first, all the snow!  Yes, I’m in an area that gets a lot of snow normally, but this winter has been especially persistent with neither the cold nor the snow ever letting up.  It’s almost April and I still have half my yard covered with snow.  It’s not from a sudden snow, but has been there since January. There’s still a high berm of snow around the driveway from plowing and two foot drifts in places out back.  One hopeful sign is that I’ve seen some snowdrops poking through.  They are not blooming yet, but soon.  Of course they usually bloom in February. Enough about the weather.

I occasionally have people ask if I can make them a special book or marble paper in specific colors.  I take these requests with mixed emotions. It’s fun having the challenge of working to someone else’s vision, but there’s the stress of knowing it could be an epic fail, like the carrageenan disaster I had. In February, I had four special requests and two of them involved making preservation boxes. To have them all come at once was unusual and messed up my hibernation plans. Everything was finished on time, but it took some juggling.

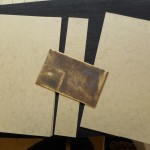
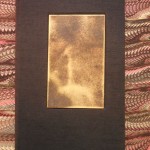
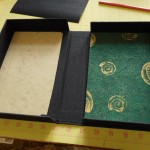
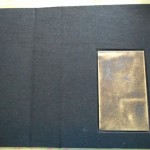
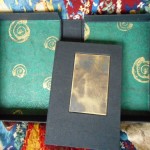
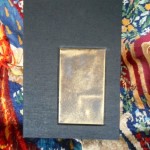
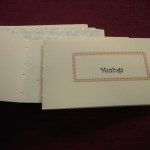
First request was for a wedding guest book with an engraved plate on the cover and endpapers to match the wedding colors.  We added a preservation box for the book and then complicated the box by adding a drawer to keep the printed ephemera from the wedding. Here’s a brief look at the process.

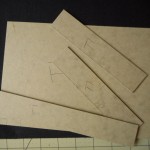
The drawer had to be larger than the book due to the size of the invitation, so I used the extra space on top to provide a place for a pen. All of the measurements have to be exact so that the contents are protected and won’t move around as the box is handled. I cut the binder’s board first, but find I often have to make slight adjustments as I’m working. Since the tolerances are small, I always am amazed that everything fits perfectly at the end.

The second request was for a preservation box to act as a portfolio for a student’s artwork.  This was a challenge as the colors and feel of the box had to complement work that I hadn’t seen and fit smoothly into someone else’s artistic vision. Plus there was time pressure.

We went through many different designs and finally settled on the combination of a black outside, gray sides, black and white paste paper interior and lined with a black and white photo.

The easiest special I did was from a customer who had bought several of my jotters in the past.  She wanted the same thing in a larger size to use in a sketching class.  I thought it was a fun idea and made some extras for sale on Etsy and at the Arts Center of Yates County.

The sketchers only have ten pages so they are perfect for day trips or to keep in a car or purse.  They are easier to organize than loose sheets of paper and keep sketches done at the same time together. I’ve used a nice drawing weight paper for the pages, so I hope people like them.

Leave a Comment

Filed under bookbinding, Boxes and Towers

Interesting Carrageenan Disaster

I’ve been marbling on a regular basis for seven or eight years now and I’ve never had problems with my carrageenan until last summer. Problems with paint, with paper, with alum, but I didn’t even think about the carrageenan; it was always reliable. Last summer I had minor problems with it starting to break down after only a day or two, but I blamed it on the heat and moved on.  Last week, I finally had time for my first marbling session in months and I was already to go when I hit a real stopper.

It went like this.  The night before, I set up my marbling space, hung my drying lines, chose my paints, mixed the alum and mixed the carrageenan, just as I always do.  Two and a half Tbsp. to a gallon of water, two gallons in all.  I use distilled water because I have an incredible amount of stuff – iron, calcium, sulfur, and more – in my well water.  As usual, I used the same blender to mix it and poured it into my marbling tray to sit overnight.

The next morning, I alummed some paper, mixed my paints and was ready to go. As soon as I skimmed the carrageenan, I could tell something was different. It was much thicker than it should have been and was very uneven. Using a stylus and my rake, I swirled them through the tray to try to even up the liquid.  I decided to throw some paint to see what would happen and this is what I got:

I rather like the wildness in the first two pieces, but it’s not exactly marbling!  As you might imagine, I was getting upset as skimming and stirring didn’t seem to help. Slowly I realized that there were big lumps of carrageenan throughout the tray and that was the problem. I thought about putting the carrageenan through the blender again or just tossing this batch and starting fresh the next day.  I tried breaking the lumps with the rakes and that helped and I found that dragging the comb from the top of the tray to the bottom caught the lumps in the tines, so I started straining out the lumps and bit by bit the carrageenan became smoother and smoother.

As I got rid of the lumps, marbling improved, but it was still very iffy.  I was able to pull some pretty good pieces, but I was still straining lumps out after every skim.  That created a problem of its own.  It was thinning out the remaining carrageenan and, instead of crisp marbling edges, I was getting very soft fuzzy borders.  I did finish up that day, but that night I took out an old packet of carrageenan from a different source and mixed a new batch for the next morning.

I still don’t really know why this disaster occurred.  It could have been that I lost count and added an extra Tsbp. It could have been mixed too little or too much. It could have been due to cold temperatures that night. It could have been some contamination in the carrageenan powder.  I just don’t know, but it was very frustrating!

Next morning I had brand new carrageenan and a brand new tray and marbling went well. In fact things were going so well that I kept on for another three days and I had lots of fun playing with overmarbling, ripples and got back in touch with marbling just for fun. Lots of pictures of my play.

In total I had almost 100 pieces – good, bad and indifferent – by the end of the session.

Now, I want to do it again!

But, before that, I have to have a bunch of plumbing replaced right over my work area.

NOTE:  Clear acrylic frames come in many sizes and make great, inexpensive marbling trays. Just remember to test how well they hold water before using.  If they leak, plumber’s Goop or other sealant will seal the edges.

18 Comments

Filed under Marbled Paper

Unfinished Matters

I haven’t posted in a while, but I have been moving forward on several fronts.  In fact, I seem to have too many half-finished projects so thought I’d give you a glimpse of some of them.  Ever since Labor Day, I’ve been trying to set up a marbling session, but something always seems to interfere.  I think it’s called Life. To marble, I really have to have at least three days clear when I can concentrate just on that – four or five is even better – and it’s just not happening.

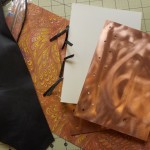
So on to what has been happening!  About a month ago,  I  wrote about some books I was starting using some of Sam’s metal.  Those books are not all finished, but progress has been made.

Metal books, memo pads and more.

This is the book and matching box I made for the brass pieces.  The brass had originally meant to be covers for a very small book, but I wanted to show them off more than that so I made this elegant book and box set.  I’m really pleased with how they turned out and can’t wait to put them in the Christmas Exhibit at our local gallery.

I’m not as happy with the Coptic book.  Love the covers, but I have never been a fan of Coptic binding. It is not very stable and doesn’t wear well.  I’m especially concerned that the metal will eventually cut through the binding cord.  If I do any more of these, I’ll have to find a way to put padding between the sewing cord and the metal, perhaps with a grommet.

While finishing the first two books, I started working on two other metal covers, but these are sewn over leather thongs.

I  haven’t finished these as I’m not sure about how I’m going to attach the spines. I don’t want an open spine, so I’ll have to attach the leather spine to the metal covers. Right now, I’m planning on a hollow spine with the thongs laced through the leather spine into the metal covers and using an adhesive to adhere the leather to the covers.  I still have to shape and pare the leather before I attach it.  Not sure how well it will work, but it’s fun trying!

Last was the book I am making from the leftover paper from the metal books.  It’s only 3″ high and isn’t finished yet.  I was going to call it “Mousings”, but  thought that might be a bit cutesy.

Next projects:

No idea what these will turn into, but I love these combinations!

Leave a Comment

Filed under bookbinding, Craft design

Problem Encounters of the Marbling Kind

One of the most satisfying experiences I have when I’m marbling is hanging a finished sheet and realizing it is perfect.  It doesn’t happen as frequently as I’d like, but it does happen.  There are so many things that can go wrong and so many variants that sometimes it’s hard to figure out where the problem occurred. After all the papers are dry at the end of a marbling session, the first thing I do is to sort my papers into piles – saleable,  usable, disaster and that rarity, perfect.

For my own clarification and maybe to help new marblers, I am going to try to look at the places where marbling can go wrong and maybe how to fix it. This will probably take several blogs and may be interspersed with other commentary.

PAPER
First comes the paper. You can marble almost any kind of paper, but the results will vary. I’ve only had two total disasters. The first was a very slick brochure, both the alum and paint tended to slide off . Some color did stick, but it was very messy.  Slick magazine pages are very iffy, they might work, but they might not. The second wipeout was a heavy “cloth-like” paper napkin.  It lay down on the tray well, but just wasn’t strong enough to hold the paint.  When I lifted it from the marbling tray, it shredded.

Different weight papers may require slightly different techniques. I tend to catch bubbles on heavier papers because they don’t roll down as smoothly. If I switch paper weights, I find I have problems with the first ones until I get into the right rhythm. With anything that doesn’t bend, like mat board, I dunk the starting corner to keep the rest going smoothly. Antique paper, like pages from 19th century books, can be marbled if you handle it gently. It may need to be laid flat on a towel to dry, rather than being hung. Hanging weak paper, of any age, may tear the corners. Although I always rinse my marbling before hanging, I’ve found that a residue of carrageenan remains on the paper  which seems to strengthen old paper. Another quirk I’ve noticed is that slightly acidic paper seems to produce brighter and crisper marbling. Almost all the the new paper I buy is acid-free, but I have stashes of print and watercolor paper that belonged to my Mother and they all have some acid content, as do the maps and book pages I use.

For my standard marbling, I use Strathmore or Canson drawing paper. For use in my books, I try to stay within the 90gsm to 120gsm range.  For cards, I use standard card stock.  I have some lovely pieces on very heavy weight paper, but haven’t figured out a use for them yet, other than framing! When I need a large colored paper, I use Pastel paper, either Strathmore or Canson Mi-Teintes.

ALUM
I’ve read many times that you should not use grocery store alum for marbling, but only buy that expressly labeled for marbling.  Guess what? They are right.  I had to try some from a bulk food store that was just labeled “alum”, not “pickling alum”.  It did work, but I had a lot more papers that had alum streaks than usual.
Problems with alum are pretty easy to spot. If there are grainy, greyish spots or spots where there is washed out color, it’s probably due to an incomplete application of alum. The predominate problem I’ve had with alum, however, is user generated. I use the non-alumed side by mistake.

CARRAGEENAN
I’ve had few problems related to the carrageenan overall.  The proportions are important as is the blending time.  I use 2.5 Tbs. per gallon of water and blend for at least one minute. (I have very hard well water so I use bottled distilled water. Most people can use tap water.) It can last for up to a week, but I did have one batch that started breaking down after two days.  Sometimes it is hard to distinguish between a paint problem, a carrageenan problem and general contamination.  In one particular case, I’m pretty sure it was just the carrageenan, because I mixed a new batch and the next day the same paint was fine. Contamination in the tray can usually be solved by a good skimming.  Just be careful to skim only on the top. If you dip too far into the carrageenan, you risk recirculating all sorts of bad stuff that has sunk to the bottom of the tray. Since all marbling takes place only on the top surface, what’s underneath can’t hurt, usually.  You can tell that the carrageenan is “worn out” if the problems affect all the colors. It also seems to manifest with globs with squarish sides rather than the rounder dots from paint problems.  The only solution for over-used carrageenan is to toss it and start again.
By the way, dirty carrageenan is Okay. In fact, it seems to work better after having a bit of paint in it.

UPDATE:  See my blog on “An Interesting Carrageenan Disaster” for a real problem I encountered.  In hindsight, I think I must have mismeasured the carrageenan and added an extra tablespoon.

PAINT

If you are planning to do a lot of marbling or marbling something special, it pays to start with quality paint.  I use Golden Fluid Acrylics because of their high pigment to carrier ratio. That means more intense colors even when the paint is thinned. They come in a wide range of colors and in several size bottles. Start with the 1 oz. size.  When you are using paint one drop at a time, you can do a lot of papers with 1 oz. Since you want the paint to float easily, avoid any “heavy body” paints. You should also avoid any paints meant for children. The cheaper paints have less pigment and can be unevenly blended causing problems for marblers.

Getting the paints balanced perfectly with your size can be very tricky.  One of the most obvious problems is having the paint contract into a tiny ball and drop to the bottom of your tray.  This happens when the paint is too thick or heavy in relation to the size.  The solution is usually to add more water to the paint, a few drops at a time.  Alternatively, a surfactant can be added to the paint.  I use Golden’s Acrylic Flow Release. Photo-Flo from Kodak can be used and marbling gall is used with watercolors.  Getting colors to spread instead of drop is usually just a matter of patience and trial and error.  I haven’t found a solution to the opposite problem, when a single drop of paint fills the entire tray! Reds and yellows are especially prone to spreading. To reduce the spread, you can try to add more paint, but I’ve found it’s easier just to start over with fresh paint and add water just a drop at a time until you have the right consistency.  I always mix very small amounts of paint to start so I don’t feel badly if I have to throw some out. Unlike painting, marbling is a matter of drops, not huge amounts.

Some paint will always drop out, at least it always does for me, but at the end of a session, the bottom of your tray should not be coated with a build-up of paint. Some scattered drops are normal.

A common problem I have is the paint granulating or stretching apart into tiny particles. This is especially noticeable when using metallics, but it happens with other colors. I haven’t found a real cure yet, but repeated stirring seems to help keep the pigments in suspension.  Just don’t stir so vigorously that you make bubbles. They are a real pain to eliminate.

If you click on the photos and examine the larger size, you can see where the paint has begun to break down. The finer I make the lines in the pattern, the more break down occurs. In some instances, like the silver and blue, the effect is gossamer, sparkly strands; in others, it is just a mess! The less you manipulate the colors, the less break down.

USER ERROR

Of course the most frequent source of problems is just me, especially in laying down the paper. All sorts of messes can occur, but air bubbles caught between the paper and the size are my most frustrating problem.  I have a gorgeous pattern in the tray and then a big bubble ruins it.

Hesitation lines are another problem I have on a regular basis. The lines occur when your paper isn’t placed on the paint in a smooth motion. Where you hesitate or jerk your hands, a line of paint forms.  This can be a desired result when you are making a ripple or moire pattern. I frequently have problems with the last corner and there’s a little line right there.  Hesitation lines are one of the reasons I don’t usually work with paper larger than 14″ x 17″. I’m short, my arms are short and stretching over a larger tray with longer paper results in lots of dips and lines.

More examples to come.

To be continued …

113 Comments

Filed under Marbled Paper

More on Cases

Explaining making cases seems to be taking even longer than actually making them!  We’re getting close to the end. Promise! This blog will be a quickie, just on covering the boards.  It’s one of my favorite parts as it is really the beginning of the end and I wind up with something that really looks like a book.  It also is the stage where my decisions on color, size and paper either come together or just miss.
So here are the graphics:

First the cover paper is cut to size leaving about 3/4″ turn-in on three sides. Fourth side will be flush with the spine. Before pasting out the paper, measure the paper against the spine and put a tiny pencil mark at head and tail.  These will be your guides as you place the paper down.  Using these marks as guides, place the dry paper under the board and trim the corners.  I use two pieces of scrap board as a cutting guide.  This gives a turn-in on the corner that is a bit larger than recommended, but it has saved a lot of covers for me!

With everything marked and trimmed, paste out the paper starting from the center.  Always put your adhesive on the paper and not the board. Paper stretches when it comes in contact with any moisture and you want it to stretch before it is on the board.  This way, as the paper dries, it will shrink giving a nice smooth fit.  Paper that has been pasted out will tend to curl or become all loose and floppy so the register marks become very important.  As you place the paper down, the marks will NOT be quite accurate because of the stretching. If you are worried about getting a perfect edge between the paper and spine, you can let the paper ride up over the spine by a tiny amount, not more than 1/32 inch.

When I paste out, I leave a very small dry area at the fore edge turn-in and on the spine edge of the head and tail turn-ins. This allows me to handle the paper from these very small dry areas and not get PVA all over my fingers. It also seems to give me more control over the paper. The bad part of this is that some papers will pucker around any dry area.  As with any technique, try several and use the one that works for you.  I work with many different weight papers for my covers and have found that I have to adapt my techniques to the paper.

Lay the paper down, starting at the spine edge and gently smooth it down toward the edges. Don’t rub it down hard until you are sure that it is smooth and positioned correctly. Make a fist and use the pinkie side to smooth down the paper. This is the flattest surface you can make with your hands. Bone folders are not recommended in smoothing damp paper. It’s just too easy to press too hard and tear the paper.  I do use them or the back of a fingernail on the edges on the board to get a nice crisp edge. After the front is pasted, flip the board over and turn in the head and tail and finally the fore edge margins.  You may have to add paste if it has dried or if you have used my “dry spot” method. Cover the back board in the same way and you are done!  Ideally you should have a 3/4″ turn-in all around the case.

Notes on special cases:  If your cover paper has a figurative design, you’ll want to take care on the cover placement.  See the airplane design in the photos. In cutting the paper, I had to waste a bit of paper to place the red plane where I wanted it. With any designs that have a definite up and down, make sure you cut pieces that are mirror images of each other, not the same and that both are facing in the same direction when on the book.  All over designs are much easier.
Half-cloth binding: On the binding that has bookcloth on the corners, I marked the board with diagonal lines 1″ in from the top and bottom fore edges. After registering the head and tail, I folded the paper along those lines. The paper was then trimmed along the same lines and pasted down, leaving the board exposed in the corners.  The small triangles of book cloth were pasted onto the board corners, trimmed, folded under and pasted down.

In general when pasting, always put the paste on the material that will stretch the most. Everything, even board and wood will stretch when wet. With some materials it is hardly noticeable.  PVA dries faster than paste which has the advantage that it “grabs” quickly and the disadvantage that re-doing something becomes harder.  Paste is much more forgiving and a cover can be repositioned several times, but it grabs more slowly and you may have to hold something in position for a while.

Next I will put the finishing touches on the textblock and marry the case to the text.

Leave a Comment

Filed under bookbinding

Making the Cases or Covers for the Books, first steps

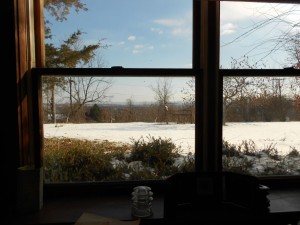
I’ve been back in the Studio playing some more with my books.  It’s been difficult for me to get back down there and I think the weather is partly to blame.  Somehow when it’s -4ºF outside, the basement doesn’t sound very appealing.  My basement is well heated, and has great natural light, but cement floors are not the warmest.  My house is built into the side of a hill so while the back is underground, I have windows all across the front with the sills just above ground level. It does have a wonderful view and I can watch birds and squirrels and sometimes deer and rabbits while I work.  Windows

There are four sets of these double windows across the front of my studio.

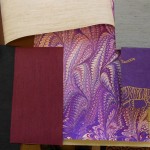
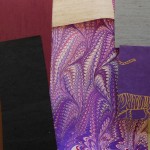
The last design step for the books is choosing the material for the spine.  I usually use an Italian bookcloth, either textured or smooth. Very occasionally I use Kennet cloth or leather.  I like leather, but it requires skill and patience, so I really have to be in the mood for it. Here are pictures of my stash of bookcloth and photos of my testing.  I take a bunch of different colored scraps and place them on the cover papers and endpapers.  One by one I eliminate the poor matches until I’m left with my final choice.  Sometimes it’s easy, sometimes not!

Notice that I carefully put everything, including the bookcloth sample into my plastic bags.  History makes me careful!

This is a short blog, but next onto making the case.

Leave a Comment

Filed under bookbinding

Sewing the Books

There are many ways of sewing text blocks for bound and cased books.  In fact there may be hundreds.  Linda Blaser wrote an article once documenting the styles she had encountered in her career as a book conservator.  I once had a copy, but can’t find it and haven’t been able to track it down. The method I usually use twists the thread over the tapes rather than leaving it flat. The benefit of this is that the gatherings are pulled tighter together.  This is important for me since I don’t have a proper book press for gluing out the spine, so the extra compression is important.  The problem is that it creates more bulk on the spine which can be unsightly, especially if you are binding with leather. If I am doing a large book that needs three or more tapes, I sometimes alternate the twist with a flat thread.  I had planned to do it on the larger books as a demonstration, but once I started sewing, I forgot!

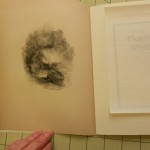
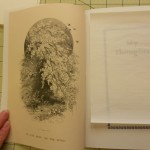
On my four current books, the first thing I had to do was to tip in the frontispieces on the two larger books.  I first trimmed the illustrations to the size of my pages plus about 1/4″ for a tab. The frontis was placed in position and the tab was very gently – I’m dealing with paper that’s about 150 years old – folded around the first gathering. Using PVA as the adhesive, it was then glued to the back of the section.  The only glue was on the tab, not on the engraving itself.  By the way, I tend to use the terms glue, paste and adhere interchangeably although technically they are different.  I only use a reversible PVA in my books.  Well, occasionally I use paste, especially with leather, but that’s a whole ‘nother thing.

Adding the frontispieces.


I’ve tried to photograph the entire process of sewing the textblock with descriptive titles from punching holes to finished sewing. I don’t use a cradle for punching as I find them cumbersome and my books are usually only five section books.  These four happen to be a bit larger, but still only have seven sections.  For the same reason, I don’t use a sewing frame, plus my books tend to be different heights.


All four text blocks.
TextblocksNext I tipped in the endpapers and trimmed them to size.  An extra 1/4″ is left along the inside fore edge of both endpapers.  This is folded under and glued to the first and last pages of the textblock.
Now it’s on to preparing the spine and covers.

You can see more of how I make my books on previous pages.  Design, Frontispieces, Sewing.

3 Comments

Filed under bookbinding