Tag Archives: hand-bound

Book Restoration Class or the Three Nancys

Week before last I was back at the John Campbell Folk School for yet another book class. I usually try not to travel in February because of the weather, especially since I have to go through the mountains of Pennsylvania and West Virginia before I get to the snow-free areas.  This year was special. When the temperature hit 50* in February and I still hadn’t had to have my driveway plowed, I started giving the trip serious consideration. I obsessed over the long-range forecasts and when they showed clear days on both weekends that I would be on the road, I called the School and signed up.  Very glad I did. It was a great class and just the break I needed.

The class was Book Restoration taught by Gian Frontini, a master in book restoration.  I have a few books that are valuable enough that I’ve been reluctant to attempt repairs without expert guidance and this was my opportunity.  Since it was a very last minute decision, I just piled lots of wounded books, a heap of bookbinding supplies and my tools in the car and took off.  Fortunately, my gamble paid off and it was a clear, easy drive in both directions.

The three books I wanted to concentrate on had similar structural problems with detached covers and some minor damage to the spine. In all of them, the sewing was sound.  The first  was a book of heraldry printed in 1619. As with most paper from that era, it was in good shape. 17th century paper was made mostly from linen rags and so is much better quality than later paper which included other fibers, and eventually wood pulp. Here’s a visual look at the process.

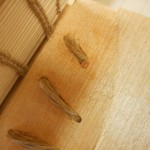
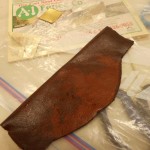
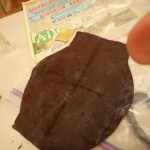
A restoration like this is painstaking work, but the results are really worth the time and effort. The first step was taking the old leather spine off of the book.  In this case there was no reason for saving any of it and I was unable to lift any large pieces anyway.  Once I was down to the paper of the textblock, rebuilding could begin.  Multiple layers of thin tissue paper were glued onto the spine. Then, in a move reminiscent of Paul Newman digging the hole in “Cool Hand Luke”, the tissue was sanded off until the spine became smooth.  Heavy threads were sewn through the textblock and twisted into new cords. Muslin was added to the spine with extra “wings” to add strength to the new hinges. Once the textblock was ready, the old boards had to be opened along the spine edge to receive the new leather spine. This was probably my most difficult part. The leather is fragile – after all it is 400 years old – and must be carefully lifted from the old board for a width sufficient to hold the new spine. Careful, tedious work. Not my forte!  The new leather was pared and carefully inserted between the old leather and the old board, the endcaps were turned in and it started to look like a book again. Last step was to add the endpapers, paste them down and put the book into the press. As a small finishing touch, I added a tiny bit of tooling to the spine, just an outline next to the cords.

Next book up was an early 19th century copy of Scott’s “Lord of the Isles”.  This book has a half-calf binding with leather on the spine and corners and a marbled paper cover, very similar in appearance to a lot of the blank books I make.  There are problems and solutions similar to the Brooke, but with some twists.

This book has marbled endpapers with matching marbling on the edges of the textblock.  Unlike the Brooke book, I wanted to preserve the endpapers, which meant I had to ease the paper off of the edges of the boards and lift it just a bit at the spine edge. The paper was pretty sturdy, but I still managed to tear it in a few places.  On the other hand, the leather was very fragile, much more so than on the Brooke which was 200 years older.  The spine on this book had some decorative elements that I would have liked to have saved for the new spine, but they are so crumbly, I’m not sure I can use them at all.  The textblock is almost finished, just have to add muslin. I have to cut and pare the leather for the new spine and attach it. The last step will be to fiddle with the endpapers so they appear to be one piece again.  Not too sure about that step.  I may have to ask for help on that.

The last of the priority books was a stamp album that belonged to my Great-grandfather when he was a boy.  Unlike the other books, this book is covered with cloth rather than leather. The book’s structure is also different. The first two are flexible bindings where the textblock was sewn directly onto the boards.  The album is a cased binding, which means the covers and the textblock were made separately and then married together.

Unlike the other books, I had to make repairs on the textblock before I could start working on the structure. First thing was to create an extra section from the loose front pages. I could have just tipped them in, but since there were six loose pages, it was stronger to join sets of pages with Japanese paper and fold them into a small section that I could sew into the textblock. At the same time, I repaired some edges, tears and gently unfolded the crumpled corner. Once the pages were in shape, new cords were made in the same way as the previous books.  I was able to line and sand the spine, but that was as far as I went with that project. I now need to create a new spine with bookcloth,  attach it to the old boards, add a hollow tube to the textblock and case in the book.  It shouldn’t take more than half a day to finish this book.

In some odd minutes I had, I also bound two small books I had had as a child that had lost all vestiges of covers.

As I said, very productive and instructive week. Learned some new techniques and am becoming more confident in the old ones.

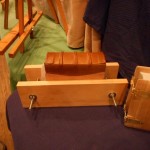
The book cradle I am using in the photos was purchased from Jim Poelstra at http://affordablebindingequipment.com/ and I love it!

Oh, and as to the three Nancys  … Yes, there were five women in the class and three were named Nancy!


2 Comments

Filed under bookbinding

Another batch of miniature and almost miniature books

I’ve really been enjoyed making these very small books and here’s another batch that I started before Thanksgiving.  I had to put them aside while working on the “Two by Ten” project, but once that was finished, it was back to the books.

The first three are traditional sewn bindings, exactly like my regular size books, sewn over tapes with endbands and ribbon markers. “Purple Prose” is slightly different.  The paper is a heavily textured, stiff paper by Strathmore that won’t bend around the Davey board without cracking. I didn’t want to do a standard limp binding, so I made a hybrid with board supporting the covers, but with the covers sticking out beyond the boards and not wrapping around them. I pasted down the endpapers to finish it off.  The last miniature was a full-bound leather book. That one was sewn around heavy cords rather than tapes to give the raised band look on the spine. I used a beautifully soft piece of leather and I love the feel of this one.

The last book was inspired by Valentine’s Day and is 4″ x 6″ and too big to be considered a miniature. Prefect size to slip into a pocket and carry with you for writing or sketching.

These books will probably go into my shop on Etsy soon.

In January, I’ve been working on new inventory for the local gallery and sorting through my inventory trying to plan the next year.  Looking through piles of paper – both mine and commercially printed – is always inspiring and I usually plan way more than I can possibly do!   I haven’t been feeling like marbling recently, but one of these days, I’ll have to knuckle down and pull out the trays.  Like so many things, once I get started, I love doing it.  It’s the getting started that’s hard!  No idea what projects I’ll start next, but that’s the nice part of being retired and one’s own boss.


Leave a Comment

Filed under bookbinding

Addendum: More Mini Books from Folk School Class

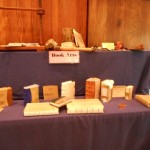
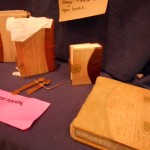
I knew I had more pictures of the mini-books and boxes made by others in the class I talked about in my last blog.  Here they are:  Enjoy the variety and colors. All of these are 3″ x 3″

Great books,  great class.  Fun times.

Leave a Comment

Filed under bookbinding, Boxes and Towers

Miniature Marbling, Miniature Books

Last July my granddaughter and I attended the Intergenerational Week at the John C. Campbell Folk School as we’ve been doing for four years now.  It’s always great fun and great learning experiences.  This year, we changed it up a bit and also went to a weekend session (Friday evening through Sunday morning).  The topic was “Miniature Marbling” and it was taught by Pat Thomas. I’d taken another course from her and just couldn’t resist this one. She was gracious enough to let my granddaughter take the class with me in spite of her age. It was fun to concentrate on tiny marbling patterns, but what really clicked for me this time was the small 3″ x 3″ book and box.

I was very busy during the summer, but that little book was always in the back of my mind.  It was a quick binding – perfect bound with thread laced into  kerfs.  I, of course, wanted a “real” binding sewn over tapes and all.  I’ve done small books before, but have never quite thought miniature.  About a month ago, I finally had some play time in the studio and I started working with this idea. Here are a bunch of photos of the first batch with narrative captions.

Because of cutting errors and some sloppy measuring, I ended up with a few extra cases.  I didn’t want to waste them so reverse engineered books to fit.  Harder than I’d imagined just because I’m used to making the case to fit the book, not vise versa.  More photos of the second batch of books.

I had great fun making these even though they take almost as long as a normal sized book.  I hope I sell lots, so I can make more!

See them on Etsy in a few days.

Leave a Comment

Filed under bookbinding

A Tale of Boxes: Wedding box, Guest Book & Portfolio

It’s Labor Day and summer is over.  My black walnuts are beginning to drop their leaves. They are always the last to leaf out and the first to fall. My summer was busier than usual with a bit of Folk School, a bit of family a bit of garden, a bit of travel, and too much teeth.  I’ve been composing blogs in my head all summer, but never quite enough time or energy to actually write them out.  This blog is really left over from last winter and spring.

As most know, last winter was too cold, too snowy and much too long.  I had several special orders that kept me sane, especially through February.  Special orders usually present challenges and learning opportunities, as they are never quite what I would choose to do if left on my own.

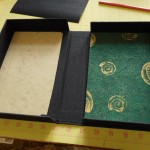
My first customer wanted a guest book in her wedding colors with a small metal plaque on the cover.  After talking, well actually messaging, about it, she decided that a clamshell box made to fit the book with a matching  insert on  its cover would be perfect.  We chatted some more about other wedding memorabilia she would have that might also fit in the box or that might be better in a matching portfolio.  The first idea was to use the invitation as a frontispiece for the book, but it was the wrong size and orientation. The outcome of our discussions was that she sent me the selection of materials and mock-ups of items that hadn’t been printed, like the menu.  As soon as I saw them, I knew what I had to do.  It’s amazing how talking, and even sharing pictures, isn’t anything like having the stuff in your hands.

The answer was to put a drawer in the box under the book.  Since the ephemera was slightly larger than the book, I was able to add a small box for a pen next to the book. I was very pleased with the result, especially since it has been years since I have built a box with a shelf or drawer.  I had my trusty Library of Congress manual right at hand during the entire process.  Lots of pictures:

This was a long process since I had to make all the paper first. After the pieces for this project were used, I had a lot of purple paper to sell on Etsy.  Fortunately, purple is popular! This customer was  a delight to work with and there were many other custom touches to the book that are not shown.

My next special order was challenging in a totally different way.  A student was presenting her fashion portfolio her professors and wanted a clamshell box that reflected her vision and her creations. Working to complement someone else’s artistic creativity is not easy. To make matters worse, she was working under a tight deadline.  Sending actual samples of papers or materials back and forth was out of the question, so we took to messaging images and descriptions back and forth, sometimes five or six times a day.  Of course colors vary according to cameras or monitors.  Fortunately, her palette was black, white, gray and a bit of red.  I don’t know what I would have done if it had been green!  I’m never able to get a good match for greens with my camera and monitor.  The actual construction was straight-forward, but all the decisions leading up to it were hair-pulling at times.  It was fun working with another artist and we were both pleased with the final result.

Her portfolio was selected to be submitted to a competition!  I hope my box helped.

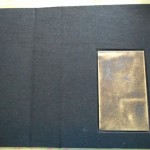
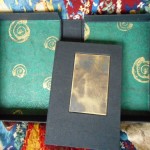
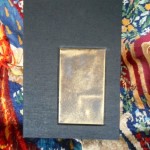
The last box was the most fun.  I was working with friends for a surprise for another friend, best of all worlds.  Everyone was nearby so we could all see the materials and the process and no second guessing.  The gift was being made to someone who was retiring from the board of a local non-profit. She had been instrumental in the creation, organization and managing a concert series in local venues.  She is also very active in local winery and grape growing organizations, so music, grapes and wines were the themes. It was decided that a boxed guest book would be the perfect gift.  I’ve been working with metal artist Sam Castner a lot recently and he was delighted to be able to help another good friend celebrate.  He created two stunning brass plaques for the book and box. I was inspired by his work and had fun choosing just the right materials for the set. Taking a note from the wedding box I had made previously, I left room for a pen in this box and the Board added a hand-crafted pen by a local woodworker. Unfortunately, I don’t have a picture of the pen.

Unfortunately, for my best box set, the photos are the worst, especially on the true colors.  Since everyone could see the work in progress, I didn’t have to send photos and hence don’t have a good record.  I need to remember this and take lots of photos when I work on anything really special.

I hope to get my next blog up soon.  It’s all in my head!  I also have new pictures to update my How to Marble blog.

If you are interested in working with me on a special box or book or set, leave a comment here or contact me on Etsy, Losing Her Marbles.

Leave a Comment

Filed under bookbinding, Preservation Boxes

Paper, leather, wood and metal

These books have it all!

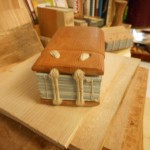
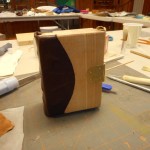
Just finished a great week at the John C. Campbell Folk School creating a book sewn over double cords, laced onto wooden boards with a metal clasp.  It was very intensive work as we used only hand tools and I’m not very skilled in either woodwork or metal crafting. Our instructor, Jim Croft, and his assistant, Brien Beidler, guided the class with great skill and wonderful patience.

As usual, I forgot to take my camera the first day and didn’t completely document some of the processes. I hope there are enough pictures that you can follow along on the path from raw materials to finished book.  The first day was spent folding, sewing, and finishing the textblock; choosing wood for the boards and designing the book.  My textblock had very little swell, so I decided to use a Romanesque/Carolingian structure which has a flat spine rather than the Gothic style (round spine) used by most of the rest of the class. Since this was a structure I had never made before, I was glad it turned out that way.

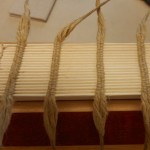
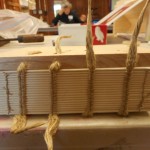
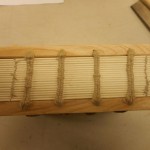
The textblock is Strathmore drawing paper which was sewn over double cords with a hand-spun linen thread. The ends of the cords were then thinned, coated with wheat paste and twisted together into points.  This made it easy to lace and unlace the boards from the cords multiple times during the construction of the book.
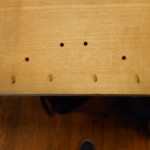
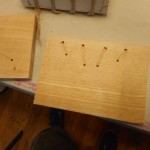
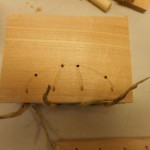
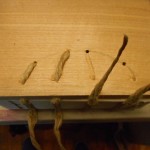
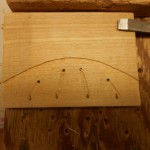
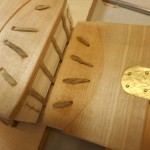
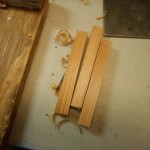
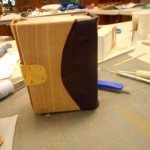
Unfortunately, I don’t have any pictures of either shaping the boards or drilling holes, but you can see the results.  With a Romanesque binding the cords are laced directly into the spine edge of the boards. The hole is drilled at an angle so the cord exits on top of the board. A second hole is drilled through the board and the cord is laced down to end on the inside of the cover. The cords are not pasted in place until the book is almost finished.

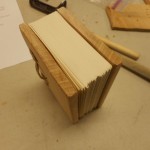
Once I knew that the cords and the boards fit, I pasted out the spine and ploughed the head and tail edges of the textblock. The boards were then adjusted to the new size of the text.  Romanesque bindings tend to have little or no square or overhang.  I didn’t plough the fore edge, but left that with an uneven, hand-torn edge.

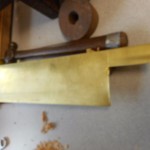
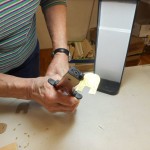
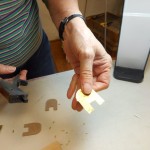
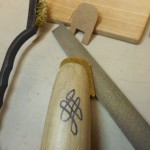
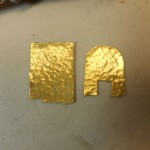
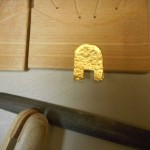
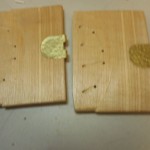
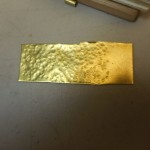
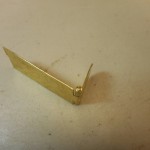
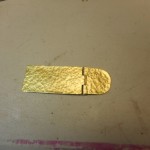
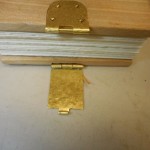
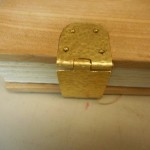
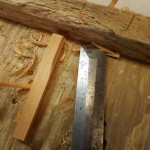
Next step was to move onto the metalwork phase, designing and making the fastening. Mine is full metal which is made in three pieces, the hinge and the catch, which are attached to the boards and the hasp, which closes the book. I started out drawing a paperboard pattern and scratching the pattern into a sheet of brass.  I cut the pattern area off the sheet and textured it with a simple dimpling by hitting it with various sized ball peen hammers. The patterns for the hinge and catch were cut and trimmed and the edges smoothed. An area of the top and bottom boards was chiseled out just enough so that the brass and the board were level. I made pins for both pieces and rolled the brass tabs around them.  That was the most difficult operation for me and I confess I had a lot of help to get it just right. Fitting the brass onto the boards involved a lot of filing, chiseling and frustration. Not much tolerance or leeway in any direction. I’ve forgotten the exact order, but the hinge and catch were fastened to the boards with rivets made from escutcheon pins and the hasp was added.  After all the fiddling, I was very pleased when everything came together and the book actually closed properly and the latch worked! Because my book was short, I had only one clasp, but most people in the class had taller books and used two clasps.

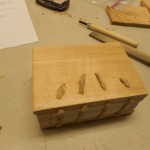
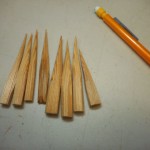
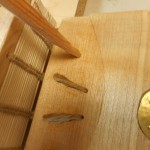
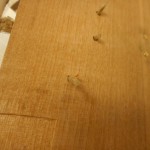
After the clasp was fitted and riveted, the boards were laced on for the final time. I pasted the cords into the grooves and then pegged the cords.  Making the pegs took longer than inserting them.  I am so not a whittler! The pegs are forced into the holes with the cords, pasted and trimmed. My pegs should have been a little thinner in the middle so they would have gone farther into the holes.

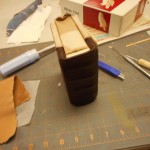
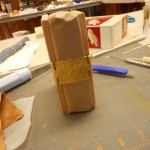
The last step is putting on the leather spine.  The leather is carefully trimmed to shape and size.  For my book, it was curved to fit the pattern on the boards and had a wide, straight-sided tab that would fold over the head and tail of the spine.  Unfortunately, I took very few pictures of the leather work. The leather is first pared, head and tail so that it will fold easily. The curved edge should fit exactly into the carved groove. After pasting it out and letting the moisture penetrate the piece, I put the leather on the book, tugging  and stretching it into place. Pasted leather is very easy to work with as it can be positioned and re-positioned many times until it is just right.  It does stretch when damp, so I had to trim it a bit. That’s the tricky part and I did get a little too much off one edge.  Before putting the leather on, I wrapped the textblock in craft paper to protect it as you can see in the photos.

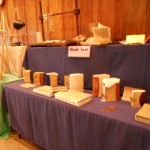
Quick look at the other books made this week.

These books take a lot of time and skill to make, so I’m not sure if I’ll ever make another one, but some of what I learned will be very useful in the future.

Leave a Comment

Filed under bookbinding

Three To Get Ready

“One for the money,
Two for the show,
Three to get ready,
And four to go.

I’ve been in the “get ready” phase for the past few weeks and the finish is almost here!  My local Arts Center is hanging their holiday exhibit next Monday and I am going to be one of the featured artists.  I’m thrilled to be chosen and have been working hard to create lots of new items for the show.  My biggest problem is that as soon as I finish something, I have the design in my head for four more things I want to do.  With hanging only a week away,  there’s very little time for anything else, besides finishing up what I’ve already started.

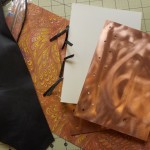
Here’s a sneak preview.

The red book with the copper insert will have a matching box and I have a third black & white box under construction.  Two more blank books are waiting for covers. I don’t think I’ll have any sheets of marbled paper, but I will have cards, a few framed pieces and some odds and ends.

If you are in the area, please be sure to visit  the Arts Center at 127 Main St., Penn Yan, NY.  “Celebration” will have its Opening reception with food, wine and art on Friday, November 21st from 5 to 7 pm.  If you can’t make the Opening, stop by anytime Nov. 21 – Dec. 31.  We’d love to see you!

Leave a Comment

Filed under Art, bookbinding, Notebooks

Unfinished Matters

I haven’t posted in a while, but I have been moving forward on several fronts.  In fact, I seem to have too many half-finished projects so thought I’d give you a glimpse of some of them.  Ever since Labor Day, I’ve been trying to set up a marbling session, but something always seems to interfere.  I think it’s called Life. To marble, I really have to have at least three days clear when I can concentrate just on that – four or five is even better – and it’s just not happening.

So on to what has been happening!  About a month ago,  I  wrote about some books I was starting using some of Sam’s metal.  Those books are not all finished, but progress has been made.

Metal books, memo pads and more.

This is the book and matching box I made for the brass pieces.  The brass had originally meant to be covers for a very small book, but I wanted to show them off more than that so I made this elegant book and box set.  I’m really pleased with how they turned out and can’t wait to put them in the Christmas Exhibit at our local gallery.

I’m not as happy with the Coptic book.  Love the covers, but I have never been a fan of Coptic binding. It is not very stable and doesn’t wear well.  I’m especially concerned that the metal will eventually cut through the binding cord.  If I do any more of these, I’ll have to find a way to put padding between the sewing cord and the metal, perhaps with a grommet.

While finishing the first two books, I started working on two other metal covers, but these are sewn over leather thongs.

I  haven’t finished these as I’m not sure about how I’m going to attach the spines. I don’t want an open spine, so I’ll have to attach the leather spine to the metal covers. Right now, I’m planning on a hollow spine with the thongs laced through the leather spine into the metal covers and using an adhesive to adhere the leather to the covers.  I still have to shape and pare the leather before I attach it.  Not sure how well it will work, but it’s fun trying!

Last was the book I am making from the leftover paper from the metal books.  It’s only 3″ high and isn’t finished yet.  I was going to call it “Mousings”, but  thought that might be a bit cutesy.

Next projects:

No idea what these will turn into, but I love these combinations!

Leave a Comment

Filed under bookbinding, Craft design

Finishing the Four Books That Were Started So Long Ago!

It usually doesn’t take me this long to finish my books. Really!  The story of these books started with the tiger blog. I’ve had many interruptions that have interfered with the flow, including one very exciting development that will be ready to be unveiled, uh,  soon.  I also gave myself a present of some super bookbinding equipment that you’ll see in the photos. I bought a finishing press and a plough from Jim at Affordable Binding Equipment.  For non-book people, a plough is a tool with a very sharp blade that is used to trim the edges of the textblock, giving an almost polished edges to the text.  They are very expensive and most non-professional binders don’t have them, instead using hand-torn, deckle or other rough edges. I rather like the rough edges as they give a hand-made feeling to the book. You can get perfect edges at your local office supply store!  That said, I enjoy having the ability now to do either with ease. Both the press and the plough are beautifully made and a joy to use.  I’m almost reluctant to use them for fear of scratches and dents.

First step was to try out the plough and cut some edges.

Ploughs usually have a straight, not circular, blade, but I found this design works well and is very comfortable to hold.  I was a bit concerned since my hands are small.  The person who recommended it to me was well over 6′ tall so I would guess that anyone would find this easy to use. Texts should be ploughed before the covers are measured to ensure an accurate fit.  I had already made the covers before I bought the plough, but I just couldn’t resist trying it out.

Next steps are to finished off the text block spine with ribbon marker (register), endbands, and mull or muslin. Then line out with paper and add a hollow tube.  With books as thin as mine usually are, some of these steps could be left out, but I usually add them all to ensure ultra-strong joints.

Now the textblock is finally finished and just needs to be married to the cover.

The textblock is carefully aligned with the cover and a piece of scrap paper is placed under the endpaper to protect the book. The endpaper is pasted out with PVA (No, it’s not Elmer’s although it looks like it!).  The waste paper is discarded, replaced with wax paper and the cover is gently closed. At this point everyone wants to open the cover to see what it looks like.  Do not do it! It’s a guaranteed way to wrinkle the endpaper. A piece of blotting paper is slipped under the cover, the book is flipped over and the other endpaper pasted down. The books is then put under weight and left to dry. It should not be opened until everything is totally dry. I usually leave my books overnight.

Finished books

If you still want to see more, please go to my page on Designing a Book and follow the links.

I will probably be putting these books up for sale on Etsy within the next few weeks.

Losing Her Marbles on Etsy

Leave a Comment

Filed under bookbinding

More on Cases

Explaining making cases seems to be taking even longer than actually making them!  We’re getting close to the end. Promise! This blog will be a quickie, just on covering the boards.  It’s one of my favorite parts as it is really the beginning of the end and I wind up with something that really looks like a book.  It also is the stage where my decisions on color, size and paper either come together or just miss.
So here are the graphics:

First the cover paper is cut to size leaving about 3/4″ turn-in on three sides. Fourth side will be flush with the spine. Before pasting out the paper, measure the paper against the spine and put a tiny pencil mark at head and tail.  These will be your guides as you place the paper down.  Using these marks as guides, place the dry paper under the board and trim the corners.  I use two pieces of scrap board as a cutting guide.  This gives a turn-in on the corner that is a bit larger than recommended, but it has saved a lot of covers for me!

With everything marked and trimmed, paste out the paper starting from the center.  Always put your adhesive on the paper and not the board. Paper stretches when it comes in contact with any moisture and you want it to stretch before it is on the board.  This way, as the paper dries, it will shrink giving a nice smooth fit.  Paper that has been pasted out will tend to curl or become all loose and floppy so the register marks become very important.  As you place the paper down, the marks will NOT be quite accurate because of the stretching. If you are worried about getting a perfect edge between the paper and spine, you can let the paper ride up over the spine by a tiny amount, not more than 1/32 inch.

When I paste out, I leave a very small dry area at the fore edge turn-in and on the spine edge of the head and tail turn-ins. This allows me to handle the paper from these very small dry areas and not get PVA all over my fingers. It also seems to give me more control over the paper. The bad part of this is that some papers will pucker around any dry area.  As with any technique, try several and use the one that works for you.  I work with many different weight papers for my covers and have found that I have to adapt my techniques to the paper.

Lay the paper down, starting at the spine edge and gently smooth it down toward the edges. Don’t rub it down hard until you are sure that it is smooth and positioned correctly. Make a fist and use the pinkie side to smooth down the paper. This is the flattest surface you can make with your hands. Bone folders are not recommended in smoothing damp paper. It’s just too easy to press too hard and tear the paper.  I do use them or the back of a fingernail on the edges on the board to get a nice crisp edge. After the front is pasted, flip the board over and turn in the head and tail and finally the fore edge margins.  You may have to add paste if it has dried or if you have used my “dry spot” method. Cover the back board in the same way and you are done!  Ideally you should have a 3/4″ turn-in all around the case.

Notes on special cases:  If your cover paper has a figurative design, you’ll want to take care on the cover placement.  See the airplane design in the photos. In cutting the paper, I had to waste a bit of paper to place the red plane where I wanted it. With any designs that have a definite up and down, make sure you cut pieces that are mirror images of each other, not the same and that both are facing in the same direction when on the book.  All over designs are much easier.
Half-cloth binding: On the binding that has bookcloth on the corners, I marked the board with diagonal lines 1″ in from the top and bottom fore edges. After registering the head and tail, I folded the paper along those lines. The paper was then trimmed along the same lines and pasted down, leaving the board exposed in the corners.  The small triangles of book cloth were pasted onto the board corners, trimmed, folded under and pasted down.

In general when pasting, always put the paste on the material that will stretch the most. Everything, even board and wood will stretch when wet. With some materials it is hardly noticeable.  PVA dries faster than paste which has the advantage that it “grabs” quickly and the disadvantage that re-doing something becomes harder.  Paste is much more forgiving and a cover can be repositioned several times, but it grabs more slowly and you may have to hold something in position for a while.

Next I will put the finishing touches on the textblock and marry the case to the text.

Leave a Comment

Filed under bookbinding