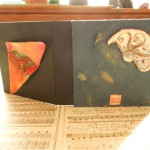
Tag Archives: John C. Campbell Folk School

Book Restoration Class or the Three Nancys

Week before last I was back at the John Campbell Folk School for yet another book class. I usually try not to travel in February because of the weather, especially since I have to go through the mountains of Pennsylvania and West Virginia before I get to the snow-free areas.  This year was special. When the temperature hit 50* in February and I still hadn’t had to have my driveway plowed, I started giving the trip serious consideration. I obsessed over the long-range forecasts and when they showed clear days on both weekends that I would be on the road, I called the School and signed up.  Very glad I did. It was a great class and just the break I needed.

The class was Book Restoration taught by Gian Frontini, a master in book restoration.  I have a few books that are valuable enough that I’ve been reluctant to attempt repairs without expert guidance and this was my opportunity.  Since it was a very last minute decision, I just piled lots of wounded books, a heap of bookbinding supplies and my tools in the car and took off.  Fortunately, my gamble paid off and it was a clear, easy drive in both directions.

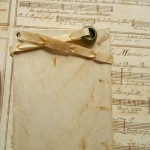
The three books I wanted to concentrate on had similar structural problems with detached covers and some minor damage to the spine. In all of them, the sewing was sound.  The first  was a book of heraldry printed in 1619. As with most paper from that era, it was in good shape. 17th century paper was made mostly from linen rags and so is much better quality than later paper which included other fibers, and eventually wood pulp. Here’s a visual look at the process.

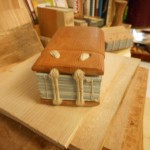
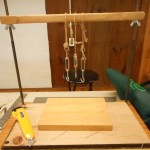
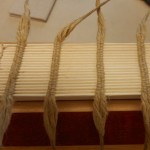
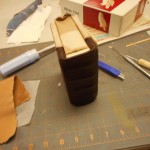
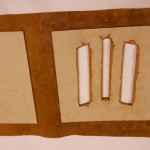
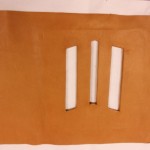
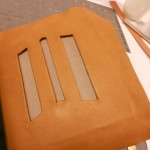
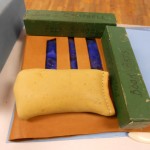
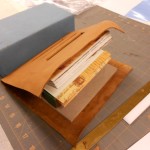
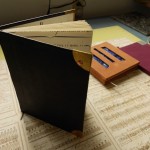
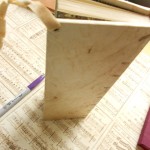
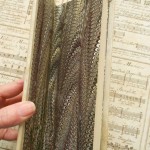
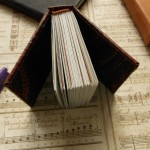
A restoration like this is painstaking work, but the results are really worth the time and effort. The first step was taking the old leather spine off of the book.  In this case there was no reason for saving any of it and I was unable to lift any large pieces anyway.  Once I was down to the paper of the textblock, rebuilding could begin.  Multiple layers of thin tissue paper were glued onto the spine. Then, in a move reminiscent of Paul Newman digging the hole in “Cool Hand Luke”, the tissue was sanded off until the spine became smooth.  Heavy threads were sewn through the textblock and twisted into new cords. Muslin was added to the spine with extra “wings” to add strength to the new hinges. Once the textblock was ready, the old boards had to be opened along the spine edge to receive the new leather spine. This was probably my most difficult part. The leather is fragile – after all it is 400 years old – and must be carefully lifted from the old board for a width sufficient to hold the new spine. Careful, tedious work. Not my forte!  The new leather was pared and carefully inserted between the old leather and the old board, the endcaps were turned in and it started to look like a book again. Last step was to add the endpapers, paste them down and put the book into the press. As a small finishing touch, I added a tiny bit of tooling to the spine, just an outline next to the cords.

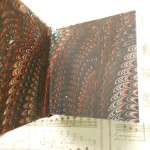
Next book up was an early 19th century copy of Scott’s “Lord of the Isles”.  This book has a half-calf binding with leather on the spine and corners and a marbled paper cover, very similar in appearance to a lot of the blank books I make.  There are problems and solutions similar to the Brooke, but with some twists.

This book has marbled endpapers with matching marbling on the edges of the textblock.  Unlike the Brooke book, I wanted to preserve the endpapers, which meant I had to ease the paper off of the edges of the boards and lift it just a bit at the spine edge. The paper was pretty sturdy, but I still managed to tear it in a few places.  On the other hand, the leather was very fragile, much more so than on the Brooke which was 200 years older.  The spine on this book had some decorative elements that I would have liked to have saved for the new spine, but they are so crumbly, I’m not sure I can use them at all.  The textblock is almost finished, just have to add muslin. I have to cut and pare the leather for the new spine and attach it. The last step will be to fiddle with the endpapers so they appear to be one piece again.  Not too sure about that step.  I may have to ask for help on that.

The last of the priority books was a stamp album that belonged to my Great-grandfather when he was a boy.  Unlike the other books, this book is covered with cloth rather than leather. The book’s structure is also different. The first two are flexible bindings where the textblock was sewn directly onto the boards.  The album is a cased binding, which means the covers and the textblock were made separately and then married together.

Unlike the other books, I had to make repairs on the textblock before I could start working on the structure. First thing was to create an extra section from the loose front pages. I could have just tipped them in, but since there were six loose pages, it was stronger to join sets of pages with Japanese paper and fold them into a small section that I could sew into the textblock. At the same time, I repaired some edges, tears and gently unfolded the crumpled corner. Once the pages were in shape, new cords were made in the same way as the previous books.  I was able to line and sand the spine, but that was as far as I went with that project. I now need to create a new spine with bookcloth,  attach it to the old boards, add a hollow tube to the textblock and case in the book.  It shouldn’t take more than half a day to finish this book.

In some odd minutes I had, I also bound two small books I had had as a child that had lost all vestiges of covers.

As I said, very productive and instructive week. Learned some new techniques and am becoming more confident in the old ones.

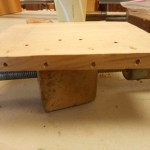
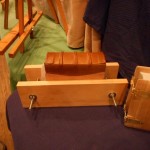
The book cradle I am using in the photos was purchased from Jim Poelstra at http://affordablebindingequipment.com/ and I love it!

Oh, and as to the three Nancys  … Yes, there were five women in the class and three were named Nancy!


2 Comments

Filed under bookbinding

Miniature Marbling, Miniature Books

Last July my granddaughter and I attended the Intergenerational Week at the John C. Campbell Folk School as we’ve been doing for four years now.  It’s always great fun and great learning experiences.  This year, we changed it up a bit and also went to a weekend session (Friday evening through Sunday morning).  The topic was “Miniature Marbling” and it was taught by Pat Thomas. I’d taken another course from her and just couldn’t resist this one. She was gracious enough to let my granddaughter take the class with me in spite of her age. It was fun to concentrate on tiny marbling patterns, but what really clicked for me this time was the small 3″ x 3″ book and box.

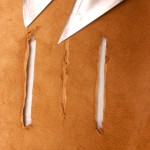
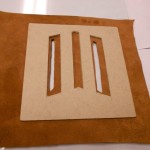
I was very busy during the summer, but that little book was always in the back of my mind.  It was a quick binding – perfect bound with thread laced into  kerfs.  I, of course, wanted a “real” binding sewn over tapes and all.  I’ve done small books before, but have never quite thought miniature.  About a month ago, I finally had some play time in the studio and I started working with this idea. Here are a bunch of photos of the first batch with narrative captions.

Because of cutting errors and some sloppy measuring, I ended up with a few extra cases.  I didn’t want to waste them so reverse engineered books to fit.  Harder than I’d imagined just because I’m used to making the case to fit the book, not vise versa.  More photos of the second batch of books.

I had great fun making these even though they take almost as long as a normal sized book.  I hope I sell lots, so I can make more!

See them on Etsy in a few days.

Leave a Comment

Filed under bookbinding

Paper, leather, wood and metal

These books have it all!
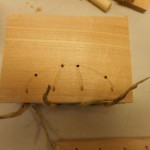
Just finished a great week at the John C. Campbell Folk School creating a book sewn over double cords, laced onto wooden boards with a metal clasp.  It was very intensive work as we used only hand tools and I’m not very skilled in either woodwork or metal crafting. Our instructor, Jim Croft, and his assistant, Brien Beidler, guided the class with great skill and wonderful patience.

As usual, I forgot to take my camera the first day and didn’t completely document some of the processes. I hope there are enough pictures that you can follow along on the path from raw materials to finished book.  The first day was spent folding, sewing, and finishing the textblock; choosing wood for the boards and designing the book.  My textblock had very little swell, so I decided to use a Romanesque/Carolingian structure which has a flat spine rather than the Gothic style (round spine) used by most of the rest of the class. Since this was a structure I had never made before, I was glad it turned out that way.

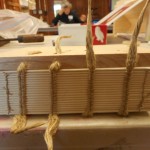
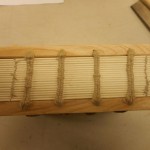
The textblock is Strathmore drawing paper which was sewn over double cords with a hand-spun linen thread. The ends of the cords were then thinned, coated with wheat paste and twisted together into points.  This made it easy to lace and unlace the boards from the cords multiple times during the construction of the book.
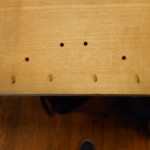
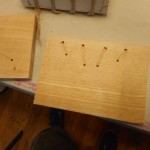
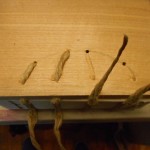
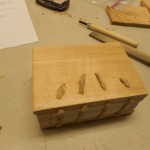
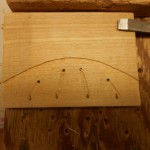
Unfortunately, I don’t have any pictures of either shaping the boards or drilling holes, but you can see the results.  With a Romanesque binding the cords are laced directly into the spine edge of the boards. The hole is drilled at an angle so the cord exits on top of the board. A second hole is drilled through the board and the cord is laced down to end on the inside of the cover. The cords are not pasted in place until the book is almost finished.

Once I knew that the cords and the boards fit, I pasted out the spine and ploughed the head and tail edges of the textblock. The boards were then adjusted to the new size of the text.  Romanesque bindings tend to have little or no square or overhang.  I didn’t plough the fore edge, but left that with an uneven, hand-torn edge.

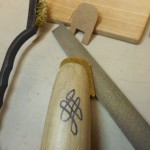
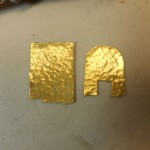
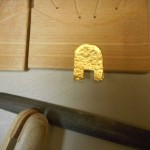
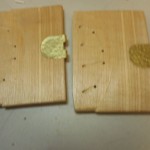
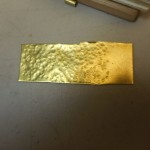
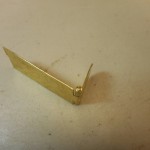
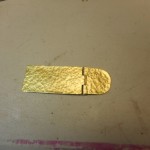
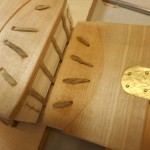
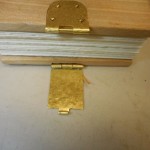
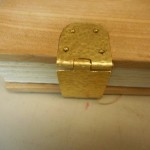
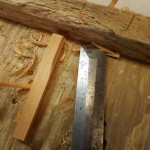
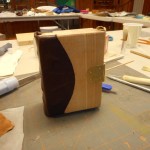
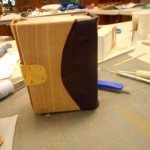
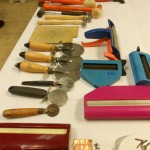
Next step was to move onto the metalwork phase, designing and making the fastening. Mine is full metal which is made in three pieces, the hinge and the catch, which are attached to the boards and the hasp, which closes the book. I started out drawing a paperboard pattern and scratching the pattern into a sheet of brass.  I cut the pattern area off the sheet and textured it with a simple dimpling by hitting it with various sized ball peen hammers. The patterns for the hinge and catch were cut and trimmed and the edges smoothed. An area of the top and bottom boards was chiseled out just enough so that the brass and the board were level. I made pins for both pieces and rolled the brass tabs around them.  That was the most difficult operation for me and I confess I had a lot of help to get it just right. Fitting the brass onto the boards involved a lot of filing, chiseling and frustration. Not much tolerance or leeway in any direction. I’ve forgotten the exact order, but the hinge and catch were fastened to the boards with rivets made from escutcheon pins and the hasp was added.  After all the fiddling, I was very pleased when everything came together and the book actually closed properly and the latch worked! Because my book was short, I had only one clasp, but most people in the class had taller books and used two clasps.

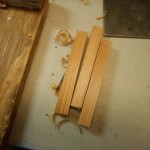
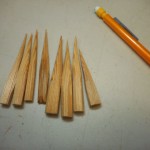
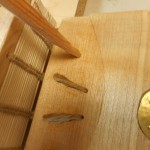
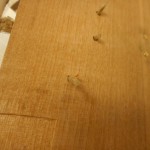
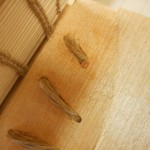
After the clasp was fitted and riveted, the boards were laced on for the final time. I pasted the cords into the grooves and then pegged the cords.  Making the pegs took longer than inserting them.  I am so not a whittler! The pegs are forced into the holes with the cords, pasted and trimmed. My pegs should have been a little thinner in the middle so they would have gone farther into the holes.

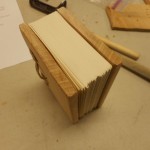
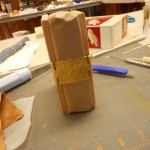
The last step is putting on the leather spine.  The leather is carefully trimmed to shape and size.  For my book, it was curved to fit the pattern on the boards and had a wide, straight-sided tab that would fold over the head and tail of the spine.  Unfortunately, I took very few pictures of the leather work. The leather is first pared, head and tail so that it will fold easily. The curved edge should fit exactly into the carved groove. After pasting it out and letting the moisture penetrate the piece, I put the leather on the book, tugging  and stretching it into place. Pasted leather is very easy to work with as it can be positioned and re-positioned many times until it is just right.  It does stretch when damp, so I had to trim it a bit. That’s the tricky part and I did get a little too much off one edge.  Before putting the leather on, I wrapped the textblock in craft paper to protect it as you can see in the photos.

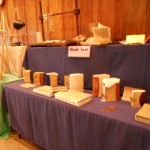
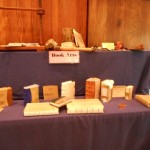
Quick look at the other books made this week.

These books take a lot of time and skill to make, so I’m not sure if I’ll ever make another one, but some of what I learned will be very useful in the future.

Leave a Comment

Filed under bookbinding

Beads in Flame, Addendum

Here are the photos I promised from the bead course. Unfortunately, I didn’t take any photos of people working on beads or lit torches.  That part is left to your imagination!

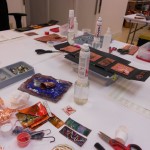
This is the enameling & glass studio, rustic on the outside and packed on the inside. There are eight student stations with a touch in front of each.  The crock pot in the center of the table is used to keep small beads warm until they can be annealed in a kiln. Large beads go directly into the kiln.

After the beads are formed on the mandrels, they are placed in the annealing kiln, which is kept at 950F until full and then allowed to slowly cool overnight.  In the morning, the kiln is opened and the beads removed like a bouquet of blooms. Beads are removed from the mandrels, cleaned and made into jewelry or just admired.

Final showing before leaving for home.

Leave a Comment

Filed under Other crafts

Beads in Flame

Last week my granddaughter and I attended the John C. Campbell Folk School’s Intergenerational week for the third time.  The first time, we took a course in wood carving, the second year was enameling and this year was creating lamp-work beads. Unfortunately, all my pictures of the class and the process are on my granddaughter’s phone and she is in a WiFi  and cell free zone for another week. You’ll have to be satisfied with a few pictures of the finished products for this blog.

The process of making beads requires concentration and coordination. A few seconds distraction can produce a lump of molten glass on the bench rather than a bead on the stainless steel stick  (mandrel).  Unlike the torch fire enameling I did last year with a hand-held torch, the smaller torch used in lampwork is fastened to the bench and both hands are used to make the bead.  That’s where the coordination comes in.  One hand holds the glass rod that is being melted to form the bead. This hand is moving constantly to make a blob or “gather” of  melting glass at the end of the rod as well as moving the glass in and out of the flame to keep it at the desired temperature.

The other hand holds the mandrel, where the bead will be formed. Once a gather is the correct size, it is carefully attached to the mandrel.  From then on the mandrel is constantly rotated to keep the bead even .  This is just for a plain bead!  Adding colors, dots, lines and other embellishments requires careful judgement and movement.  If a bead is heated or cooled too quickly it will crack or even explode.  Good depth perception is also useful to keep everything just where you want it in relation to the flame as bead and the rod need to be cooled slightly at times and heated at others.

My granddaughter and the rest of the class were able to coordinate all the movements well by the second day.  I had trouble keeping the right hand rocking back and forth while the left hand was rolling clockwise. My beads tended to become oval as the left hand rocked instead of rolled. 

Glass rods come in a myriad of colors, both opaque and transparent.  It was great fun playing with the colors and especially the combination of clear and solid.  Some of my favorite designs were on beads that broke in the annealing process.  I’d love to have the luxury of just spending hours by myself honing the techniques and really developing a fluency in the art. In reality, I have paper to marble, boxes to design and books to make.  Maybe some time …

In the meantime, here at home things were growing and growing.  Here are some new pictures of my garden and herb patch.


Herbs are a bit overgrown and need edging, but they are lush due to all our rain.  Tomatoes are slowly ripening – haven’t had enough sun, but the cherry tomatoes are beginning to come on. Delicious!  I’m not doing pickles this year so there aren’t many cucumbers, just enough to eat.

I’ve ordered a batch of paper and paints for some special orders and am planning to get back on track with marbling next week!  If it happens, I’ll be blogging my progress.


Leave a Comment

Filed under Life, Other crafts

Corners, Double Boards, and Gothic Bindings

Finally, back to my books from the Folk School.  My first two books are shown here.  I have always said that I don’t work in leather. It’s too fussy, too expensive and too time consuming.  This week I ended up four leather bound books!  The most complicated is a variation on a traditional Gothic structure.  I cheated and used a textblock sewn over tapes rather than lacing in the boards, so it is more like a cased rather than a bound book.

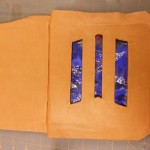
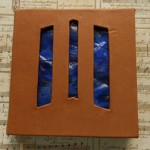
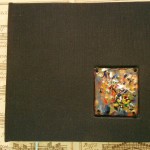
Many important Gothic and Victorian psuedo-Gothic books were made with double boards, allowing many different types of ornamentation. While thinking about what I could do with double boards, the idea of windows kept running through my mind.  I had a piece of very thin copper that I had tried to torch fire. It didn’t come out very well.  It was bumpy and uneven and generally a bit of a mess.  I had no idea if it would just crack when placed between the boards.  I was able to trim the copper to a suitable size, so the first problem was overcome.  Here are some photos of the process.

Fortunately, the enamel hasn’t cracked and the bumpiness gives an interesting texture to the piece.

The other book I made with an enameled piece was an easy one.  I used the same technique I had used before with coins.  I cut a recess in the top board, tucking the bookcloth into the recess and glued the piece in place. I used this same technique with a black cloth book after I returned.

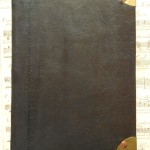
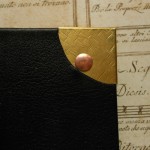
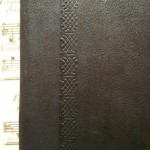
The last technique we used was working with metal – brass, copper, bronze and pewter – as corners, bosses and latches. This was the first time I had ever worked with metal and was a bit of a challenge.  Metal has to be exact.  You can’t nudge it, pinch it or approximate. I’d love to have more time to work with metal and hope I can in the coming year.  For this time I just made some brass corners. Not much for a metal worker, but exciting for me.  There’s a lip that fits around the edges of the boards and then the corner is fastened to the boards with a rivet. I also gave a brass a bit of texture. As a final touch, this book has a line of blind tooling parallel to the spine.

So that finishes all five books I made during my week.  Since I’ve been home, I’ve been finishing up odds and ends, trying to put together stock for the shopping season.

You can always find my books and paper on Etsy via my page or by going to www.Etsy.com/shop/LosingHerMarbles

Leave a Comment

Filed under bookbinding, Craft design

Books, Metal and Magic

It has taken me a long time to get around to this blog about my last week at the Campbell Folk School.  I’m not sure why – the press of catching up, my tiredness from the week or just the difficulty of encapsulating seven very busy and eventful days.

I think I’ll start backwards and show the books I finished during the week first and go into detail later.

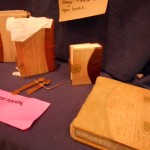
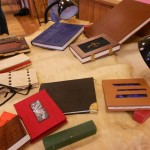
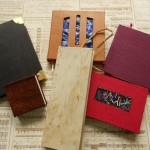
As you can see from the outside of these books, I was playing with lots of different ideas.  What you can’t see, is that the  internal structures on these are quite different.  Unfortunately, I couldn’t find my camera for the first few days, so I have no pictures of some of the books in progress.  I’m hoping some of my classmates will share a few of their pictures.  There were only four students in the class and we were all working on very different projects, but there were some commonalities.

The first book I made was the 12th century account book.  I love the shape and size of the book. It’s only 3 1/2″ wide by 10″ tall.  This type of book was used for accounts and also for reading aloud. Since most of the population was illiterate, recitation and reading aloud were very important social and cultural activities.  I can imagine Chaucer holding a book like this and reading his poetry in the English Court.

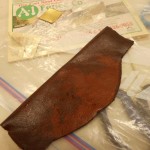
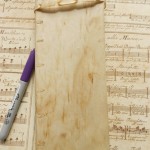
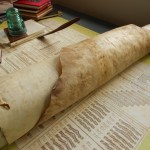
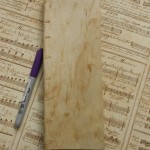
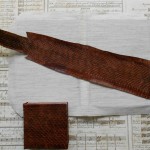
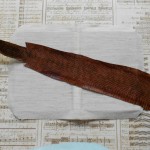
The instructor, Gian Frontini, had made a book like this from vellum. I had found some old rolls of rawhide in my basement and had brought them with me on the chance I could find something to do with them.  The match was perfect! My rawhide had been cured and scraped rather crudely which left some interesting texture and markings on the book.  I used a slightly rough Fabriano paper for the textblock. It was sewn over narrow strips of the cover rawhide which were later laced into the boards.  You can see the lacing in the photos. I made the headbands with embroidery floss, sewing them into the textblock. The book was then finished off anachronistically with some of my marbled paper.  Even though it is not correct for the period of the binding, I felt it was a wonderful match for the organic feel of the book.  Traditionally, all the edges of the book would have been painted, usually red, but I decided not to.  A laced thong of rawhide was added to the back board of the book. The thong helps to keep the book closed and was also used as a “leash” for the book.  I added a small silver bauble to help in grabbing the book.

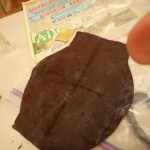
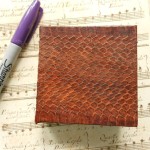
I had also found in my basement ( yes, it is a bit like Aladdin’s cave) a long, narrow roll of snakeskin.  I threw it into my box at the last minute intending to ask Gian if I could use it for something in binding. The answer was yes and I decided to make a very small book.  The snakeskin at it’s broadest was less than 4″ wide, so I settled on a book that’s only 3 inches square. Because it’s so small, I made it thick. Lots of pages with few words on each!  Like the rawhide, the snakeskin had to have Japanese paper pasted to the reverse side to give flexibility and durability to the piece. I sewed this textblock with a running Coptic stitch that was used in many Gothic books.  This stitch is not as stable as sewing over tapes, but it is more appropriate to the materials.  I cheated here on the headbands and use the paste on variety, mainly because I was afraid of running out of time. The spine was not glued down, but left as an open tube.  Again, I used my marbled paper as endpapers – a very snaky match.  I was amazed that I had brought just the right papers with me.  I only brought four or five sheets with no plan of how I would use them.  To find I had two that were such great matches was miraculous.  If you have read any of my blogs, you know how I agonize over finding just the right papers.

Next blog I’ll talk about my metal corners, enameled insets and unfinished business.


1 Comment

Filed under bookbinding, Craft design

Learning to Torch Fire Enamels

As promised, here’s a blog about the quick weekend course on using hand-held torches to fire enamels on copper. Last summer my granddaughter and I had taken a week-long workshop that covered both kiln and torch firing. I had enjoyed that and have already used a few of my pieces in my books, so I was looking forward to being able to learn some new techniques and make more pieces.  I was not disappointed.

For the basic procedures we used, see the page on Enameling.

The trickest problem with torch firing is that the copper can’t have a counter-enamel on the back.  Without a counter, the enamel is more fragile and if it is put on too heavily, will crack or warp easily. I cheated on some pieces and countered them in a kiln.

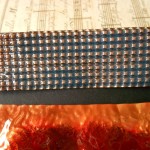
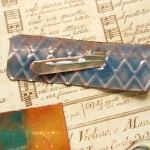
Texture was the first thing we worked on. The copper we were using as a base was rather thin and was easy to texture with crimpers, rollers and corrugaters as well as hammers. I found that putting a heavy texture into the copper made it sturdier and less likely to warp.  Because I need flat pieces for my books, I was very aware of warping.  Some examples:

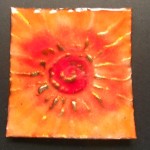
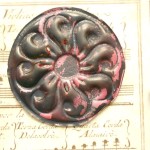
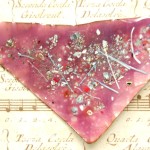
If you want the texture to show, the enamel has to be transparent, not opaque.  On the pinky-rose piece, even with transparent enamels, the underlying texture was lost because of the amount on enamel I put on the right side.  You can see the texture on the reverse. I really enjoyed playing with the various textures and could have spent a lot more time on it.  Unfortunately on the weekend courses you really have only one day of work.  The entire class spent Saturday from 9:00am to 9:00pm torching in spite of cold, wind and dark.  We used the torches outside, so light was a problem.  Unfortunately, I don’t have a picture of the torch table, but there were 6 or 8 torches set up around a table outside.  After putting the enamel on a piece, it had to be carried outside to be fired. One advantage was that it was cold enough to cool the metal quickly afer firing.

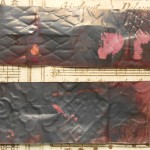
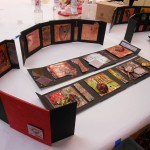
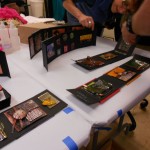
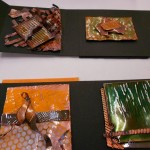
The instructor, Steve Artz, made boxes for all of the students as a way for us to display the pieces of enamelling we completed.  Here are some pictures of the boxes as well as some close-ups of my pieces.

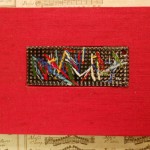
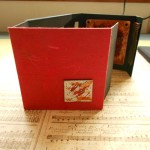
Lastly, here are two completed books. The black one has a piece I made in the summer.  The red book was made with a torch-fired piece in the Book Embellishment workshop, which will be my next blog.

Leave a Comment

Filed under Art, Craft design, Other crafts

Kilns and Torches and Enameling Fun

My granddaughter and I just finished our second year attending the Inter-generational Week at the John C. Campbell Folk School.  Last year we did woodcarving and this year we did enameling.  At its simplest, enameling is the process of heating glass and copper together so that they form a bond and the glass fuses to the copper base.

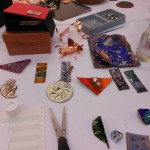
In this class, we used sheet copper most of the time which could be shaped by repeated heating and cooling.  For most of my work, I stayed with flat forms because I’m hoping to be able to use these pieces in my bookbinding.  Someone said to me that I seem to like rectangles and squares!  Only because my books tend to be that shape.  Here are photos of some of the finished pieces.

We used both torches and kilns to fire the pieces.  The kiln was more predictable, but the torches were more fun!

I’ve added a lot more detail about how we worked, the materials we used and lots more pictures here.  I’m excited to start trying to use these on some books.  I have no idea if it’ll work, but it will be interesting!

On a totally different topic, I had lots of time to think as I was driving home, it took 2 1/2 days! One of the things that struck me, was the way the road has changed.  I’ve driven Route 15 through Pennsylvania on a rather regular basis since the early 1970’s. In the early days most of it was two or three-lane, but now it’s almost completely a divided, four-lane limited access highway.  Some of it still goes over the path of the old road, which may have been over game, trails, Indian paths, logging roads – I haven’t researched it.  That evolution has been very fast.  My image, though, was of archaeologists several thousand years from now, long after the automobile has gone the way of the chariot, painstakingly unearthing, studying and recreating all those multiple layers of roadway.  Even now in towns and cities, when streets are replaced 19th century bricks, logs, rails etc. are found.  Just a thought while driving!

Oh, and by the way, I have lots and lots of HUGE cucumbers.  They’ve turned slightly bitter, so I think they’ll be compost or rabbit food, but the tomatoes are just beginning, so I haven’t missed those.

1 Comment

Filed under Craft design, Other crafts

Shimmer & Shine

One aspect of marbling that haven’t explored much is the use of metallic paints.  I had tried some in the past with rather mediocre success and just hadn’t worked with them again.  During the class at the Campbell Folk School this fall,  I had some very successful pieces with metallic paints.

These two pieces show the use of metallics. In my last marbling session, I decided to explore their use a bit more, trying to match metallics with colors and just seeing how they reacted with other colors.

One of the first things I verified was that metallics just don’t show up well on white paper.  They tend to just look like a flat brown, orange or grey.  The colors I was playing with were gold, copper, bronze and silver.  Here are three white cards that had gold and copper on them.

As you can see, it’s hard to tell where the metallic is.  In contrast to this, here are some of the pieces I made with metallic paints using colored card stock.

The papers used for these pieces were black, royal blue, red, and purple. The gold and coppers are much clearer.  The amount of shininess depends entirely upon the amount of paint dropped.  On some of these there is way too much.  One problem that arises with metallic paint is that it granulates very quickly and has to be constantly stirred – without making bubbles!  This paint had the added problem that it was old and even more prone to coming out of suspension.  Fine for experimenting, but not the best.  That is why there are so many little “bits” of paint in the designs. These are especially noticeable on the fine lines of the get-gels.  On the purple stone piece, I decided to join rather than fight, so I left it at the stone stage without trying to do any drawing out.

I think I’ll continue working with metallic paint, in moderation.  I like the clear crisp colors a bit better, but it does have a place in my marbling palette.

1 Comment

Filed under Craft design, Marbled Paper