In the past few years, several people have asked if they could use my blank books as scrapbooks. My answer has always been an emphatic, “No!” Inserting extra thickness into any tightly bound book will sooner or later break the spine. With a Coptic or long-stitch binding there is a bit of leeway, but as soon as the boards or covers move beyond being parallel, the hinges are put under stress and will break. I have made some books that are suitable for scrapbook use and I thought I’d document how I construct them.
The goal in building this type of book is to accommodate extra thickness between the pages while using a strong binding structure that will support extra weight. I, personally, don’t like making scrapbooks: they tend to be large and I like small. The pages are difficult to sew and the endpapers can be a pain, but enough whining, here’s my current foray into the art of building a scrapbook.
Many steps are identical to the construction of the usual sewn binding, but I’ve included photos of most steps so you can follow along. See my pages on “Making a Book” for more information.
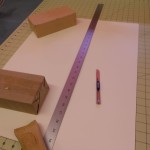
- Cutting sheet to height by hand
- Creating deckle edge for fore edge
- Finished fore edge
- Cutting width
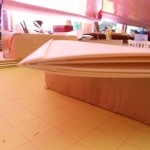
- Folding tab on page
- Pages with tabs folded
- Normal book without tabs
- Section with tabs
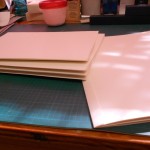
- Pages under weight to crease tabs
- Sections ready for sewing prep
There are many ways of creating space between book pages. I have used the “tab” method. In a usual sewn book, each leaf is folded in half to make two pages (four sides), so if you are making a book 5″wide x 7″high, each leaf will be 10″x 7″. For tabbed pages, the paper is cut just 1/4″ wider than a single page, 51/4″x 7″. The 1/4″ is folded over and hooked around the page next to it, creating a tab that makes a space between the pages. The hooked pages are gathered together in twos or fours to make sections. The sections are sewn, just as in a regular book.
- Textblock is squared and marked
- Ready to trim top edge
- Textblock in press, ready to plough
- Ploughing top edge
- Ploughing top edge
- Gluing out spine
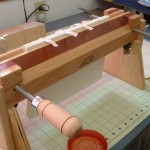
- Finishing press
- Finishing press & plough from Jim http://affordablebindingequipment.com/
Textblock almost finished!
- Cutting the endpapers
- Folded endpaper
- Tipping in endpaper
- Bottom endpaper ready to trim
- Trimming endpaper
- Finished endpaper
- Spine bits ready for finishing
- Ribbons and endbands
- Muslin
- Lining out and hollow tube
Adding decorative endpapers and completing the spine structure finishes the work on the textblock. I tend to overbuild the spine, reinforcing the hinges with muslin as well as the tapes. If you examine a well-used book, you can easily see that the spine and the hinges are the places that show the most wear. This is one of the reasons that I don’t care for Coptic or long-stitch binding. They can be interesting, beautiful or fun, but they won’t handle the use and abuse that a sewn binding will.
Making the Case
- Marking the spine width
- Trimming the bookcloth for the spine
- Measuring the cover paper
- Cover papers and spine
- Trimming the corners
- Bookcloth attached to boards (inside)
- Spine stiffener added
- Bookcloth turned in
- Finished spine (outside)
- Finished spine (inside)
- Ready to add cover paper to boards
- Pasting out
- Pasted cover
- Ready for turn-in
- Finished covers resting under weight
Last step will be to marry the textblock and the case.
- Textblock is placed inside cover
- PVA used to glue down tapes & muslin
- Muslin glued
- Entire endpaper glued out
- Waxed paper protects textblock
- Cover is closed on endpaper
Casing out completed and the entire book is placed in a press or under weights until all the PVA is dry. Tomorrow will be the big reveal!


